1/27/2014

胚芽麵包 Wheat Germ Bread


This dough is basically a no-knead. I refrigerated it for 7 days and baked it, then froze it. We're not going to eat it right away but I thought the dough should be baked otherwise the wheat germ in it might go rancid.

Great chewy texture! With great wheat taste. I thought I was eating a baguette. (Yes, I ate a slice.)

這是個免揉麵包,我冰了它七天,拿出來烘烤,然後放涼、丟冷凍。我們家沒有要馬上吃它,可是麵團裡含有小麥胚芽不能冰太久,怕會壞掉。

組織很有嚼勁喔!帶有很棒的麥香,像在吃法國麵包一樣。(當然要試吃一片啊)


Nice oven spring! | 麵團進爐後膨脹得好漂亮啊!


Wheat Germ Bread

Ingredients:
  • water 190 g
  • yeast 2-3 g
  • salt 4 g
  • all-purpose flour 230 g
  • wheat germ 10 g


Directions:
  1. Mix all the ingredients well. Let it rise for 2 hours then put it into the fridge for up to 7 days.
  2. Scrape the dough out onto a floured surface. Quickly but gently shape it.
  3. Let it sit for 70-80 minutes on a baking sheet lined with parchment paper. Cover loosely with plastic wrap. (Don't use damp cloth, it will stick.)
  4. Preheat the oven to 450F. Dust and slash the dough. Bake for 30 minutes. (If a crusty crust is preferred, feel free to use some steam.)
  5. Let it cool completely before slicing.


胚芽麵包

材料:
  • 水 190 克
  • 乾酵母 2-3 克
  • 鹽 4 克
  • 中筋麵粉 230 克
  • 小麥胚芽 10 克


做法:
  1. 所有材料混合均勻,置於室溫發酵 2小時,然後放入冷藏,七天內用掉。
  2. 桌上撒些麵粉,麵團刮出,迅速但輕柔的整形。
  3. 烤盤上鋪烘焙紙,麵團靜置 70-80分鐘,用保鮮膜輕輕覆蓋(不可以用濕布,會黏住。)
  4. 烤箱預熱 450F/230C。麵團上輕輕篩上麵粉、用利刃劃線,送進烤箱烘烤 30分鐘。(如果喜歡歐包的硬脆外皮,可以製造一些蒸氣)
  5. 出爐後完全放涼再切。

Pin It

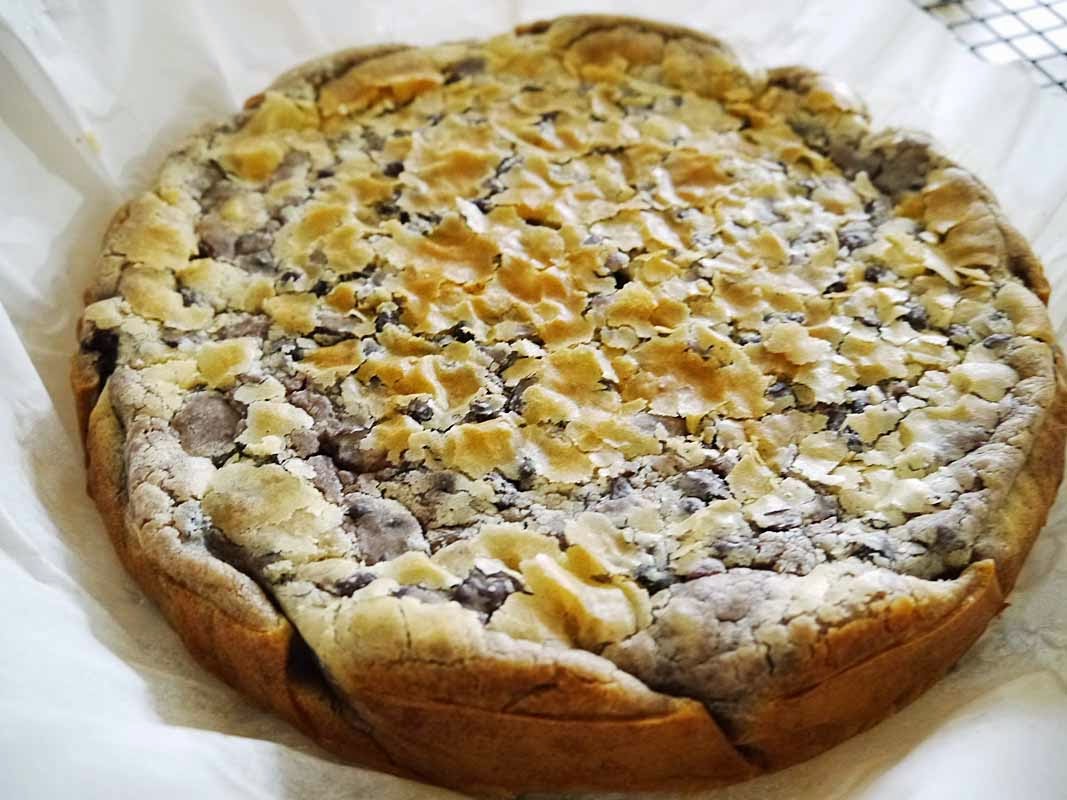
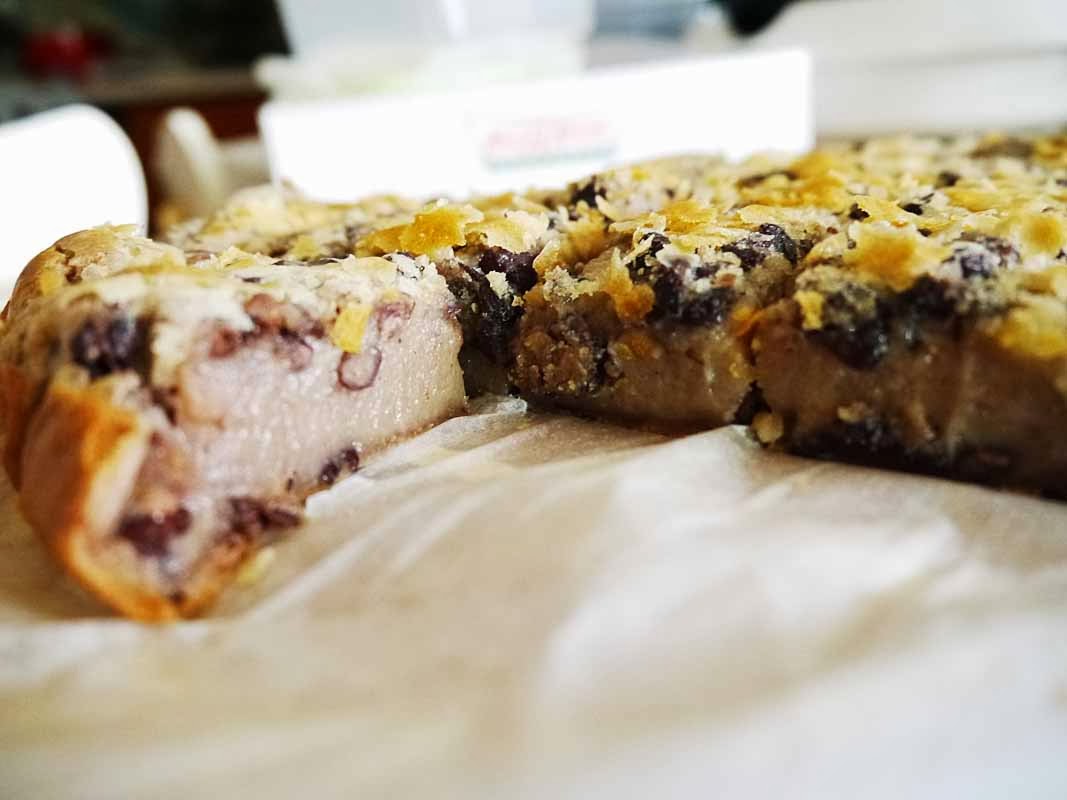
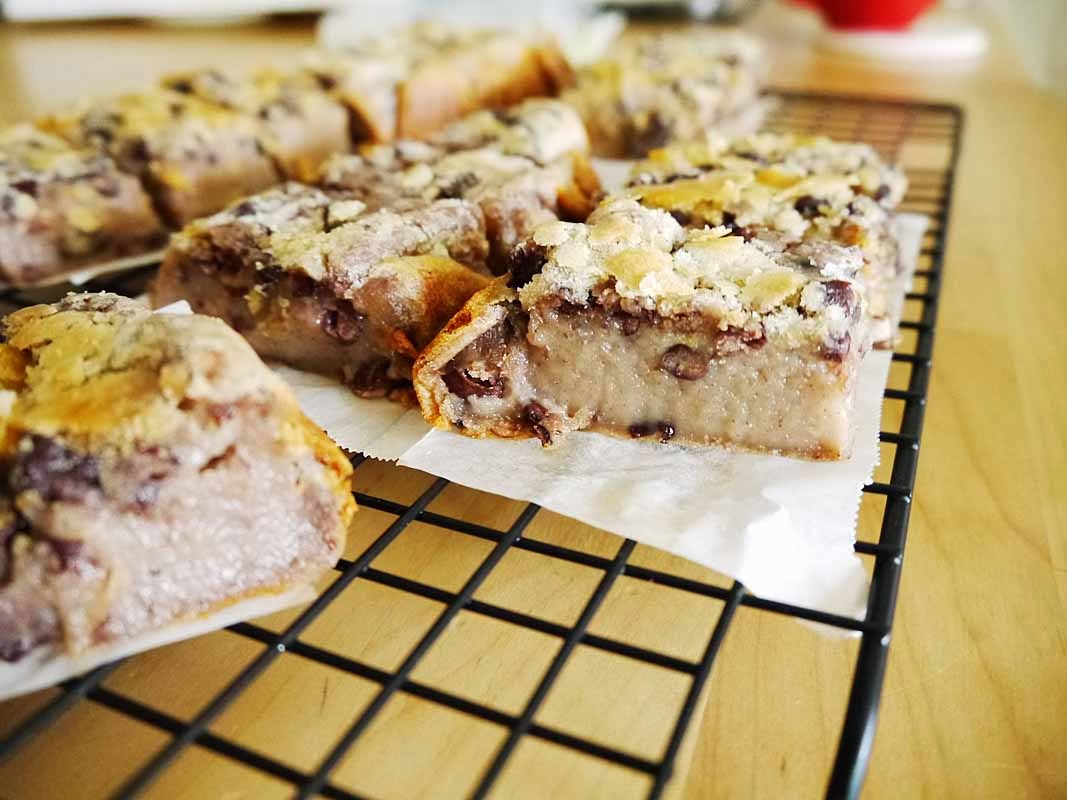
酥烤紅豆牛奶年糕 Red Bean Rice Cake


Glutinous rice cake (nian gao) is popular during Chinese New Year. I like it the best when it's wrapped in batter and fried. But, yup that's a calorie bomb! This recipe from KT stayed in my to-do list for a while. Finally I got some glutinous rice flour and Chinese New Year is around the corner!

It is so easy that I forgot what KT mentioned about temperature... So it cracked.

For the recipe, please click on the hyperlink below. It is in Chinese.


年糕在農曆新年期間是一定要吃的,其實我覺得最好吃就是裹上麵衣下油鍋炸的香酥,不過那熱量和脂肪真是讓人吃不消啊~矽谷美味人妻 KT的這份食譜我看好久了,總算是買了包糯米粉回家,正好也快過年了。

實在是太簡單了,送進烤箱後完全就忘了 KT提醒的溫度和龜裂的問題...


Pin It

1/26/2014

廚房女神奈潔拉:豬五花,辣椒和茴香籽 Nigellissima: Pork Belly Slices with Chilli & Fennel Seeds


Fennel seeds. It's a new spice in my kitchen. And also fennel bulb. I did had fennel leaves and egg stir fry before, my grandma made that sometimes, and usually with a hint of rice wine and sugar. But the bulb? Never seen it in my home country.

So it's a fennel theme lunch today. (Is it? What about the pork??)

茴香籽,新的香料!茴香球莖也是,以前有吃過阿媽做的茴香葉炒蛋,帶著米酒和糖的味道,但球莖在台灣可是從來沒見過。

今天的午餐很茴香。(咦?主菜不是豬五花嗎?)

My pork slices are rather thin, 60 minutes in the oven is enough. | 我的豬五花很薄,烤 60分鐘就夠了。


Garlic, olive oil, fennel seeds, dried chilli flakes, salt. That's all.
蒜末、橄欖油、茴香籽、乾辣椒片、鹽,就這樣。


Oh beautiful! | 真美的畫面


Fresh fennel slices, chopped tomatoes. | 新鮮茴香切片、番茄丁。


Mix the oil, fennel slices, tomatoes with pasta and spinach. My boy had it for lunch, too.
Next time I should give him a serving without chili.
烤盤裡的油、茴香片、番茄丁、義大利麵、菠菜拌一拌。兒子也一起吃。
下回應該要準備一份沒加辣椒片的給他。


Pin It

1/23/2014

三戰:吳寶春金牌牛奶吐司 3rd Try: Pao Chun Wu's Gold Medal Milk Loaf


My 1st try | 第一次嘗試:
Pao Chun Wu's Gold Medal Milk Loaf | 吳寶春金牌牛奶吐司
The 2nd try | 第二次:
2nd Try: Pao Chun Wu's Gold Medal Milk Loaf | 二試:吳寶春金牌牛奶吐司


Many people make this loaf in a stand mixer but I don't have one. I always enjoy kneading by hand. It may be more difficult to control the temperature when hand kneading. After doing more searching and asking for Charlene's advice, I froze my flour, salt, and sugar for an hour or so, kept water, milk, and yeast in the fridge before use, and left the butter at room temperature. During kneading I checked the dough temperature and it was 80F/26.6C when done.

1st rise at room temperature (76F-ish/25C) for 90 minutes.
2nd rise in the oven with a cup of hot water for 50 minutes + 20 minutes in an oven which is turned on for just 1 minute.

Also I increased the flour to 330 grams (and other ingredients according to the proportion of course) and yeast to 5 g cuz I found what the original recipe uses is instant but mine is active dry.


bread flour 330 g
salt 5 g
sugar 26 g
water 148 g
milk 76 g
active dry yeast 5 g
butter 16-17 g

Let dough rest for 20 minutes before rolling out and rolling up twice.
Bake at 350F/176C for 30 minutes in an open pan.

80F when the kneading is done. | 麵團揉好時的溫度是 80F/26.6C


絕大部分做這條金牌吐司的人都是用攪拌機來揉麵,但我沒有攪拌機,而且我一直都很享受手揉麵的感覺。手揉或許會比較不容易控制麵團溫度。在重新做一番搜尋、徵詢過羅比媽 Charlene的建議之後,這次我事先將麵粉、鹽、糖混合放入冷凍庫一小時左右,水、牛奶、酵母使用前都放冷藏,奶油放室溫。在揉麵的過程中幾次測試麵團溫度,揉成終溫是 80F/26.6C。

第一次發酵在室溫下(76F/25C左右)90分鐘。
第二次發酵和一杯熱水一起放在烤箱中 50分鐘+20分鐘在預熱了一分鐘的烤箱。

此外這次增加了麵粉用量到 330克(其他材料也照比例增加)、酵母增加到 5 克,因為我發現原版食譜用的是速發酵母,而我的是一般乾酵母。


高筋麵粉 330 克
鹽 5 克
糖 26 克
水 148 克
牛奶 76 克
乾酵母 5 克
奶油 16-17 克

兩次擀捲之前麵團各休息 20分鐘。
350F/176C 不帶蓋烘烤 30分鐘。


The windowpane test. | 測試薄膜


This is what I want! | 噢!這就是我想要的!!

Delicate crumb! | 細密的內身

Left: the 3rd loaf with monitoring the temperature while kneading. Right: the 2nd loaf.
左:注意溫度控制做出來的第三條。右:第二條。

Left: a slice near the end of loaf. Right: a slice in the middle. (From the same loaf.)
Next time I should closely watch the temperature during the 2nd rise.
左:比較靠近吐司頭的切片。右:中間的切片。(來自同一條吐司)
下次要更注意二次發酵的溫度。

Pin It

二試:吳寶春金牌牛奶吐司 2nd Try: Pao Chun Wu's Gold Medal Milk Loaf


My 1st try | 第一次嘗試:
Pao Chun Wu's Gold Medal Milk Loaf | 吳寶春金牌牛奶吐司
My 3rd try | 第三次嘗試:
3rd Try: Pao Chun Wu's Gold Medal Milk Loaf | 三戰:吳寶春金牌牛奶吐司


This loaf is supposed to have a delicate, denser crumb. My first loaf was tender but the texture could be better. This time I used bread flour and decreased the amount from 370 grams to 300 grams. Yet the result is not satisfying, even worse than my first one. The flavor is good but not the crumb.

I guess it's the temperature.

Wu's recipe emphasizes the temperature of kneaded dough should be 79-82F/26-28C but I had never kept that in mind, still using room temperature ingredients, not to mention testing the temperature of my dough. Also I might over-rise the dough.

water 135 g
milk 69 g
yeast 3 g
salt 5 g
sugar 24 g
bread flour 300 g
butter 15 g

Bake at 350F for 30 minutes in an open pan.


這條吐司的內身應該要是細緻的,我做的第一條很軟,但是組織不夠好。這次我用了高筋麵粉 300克,結果仍然不滿意,甚至比第一次更不滿意。口味上是很好吃,但是組織不對。

我想是溫度的關係。

吳師傅的這個配方很強調麵團攪拌/揉成的溫度應該要落在 79-82F/26-28C 但我從來不當一回事,仍然使用常溫的材料,更別說要量看看麵團的溫度了。而且二次發酵可能發過頭了。

水 135 克
牛奶 69 克
酵母 3 克
鹽 5 克
糖 24 克
高筋麵粉 300 克
奶油 15 克

350F/176C 不帶蓋烘烤 30分鐘。

The windowpane test. | 測試薄膜

Pin It

1/21/2014

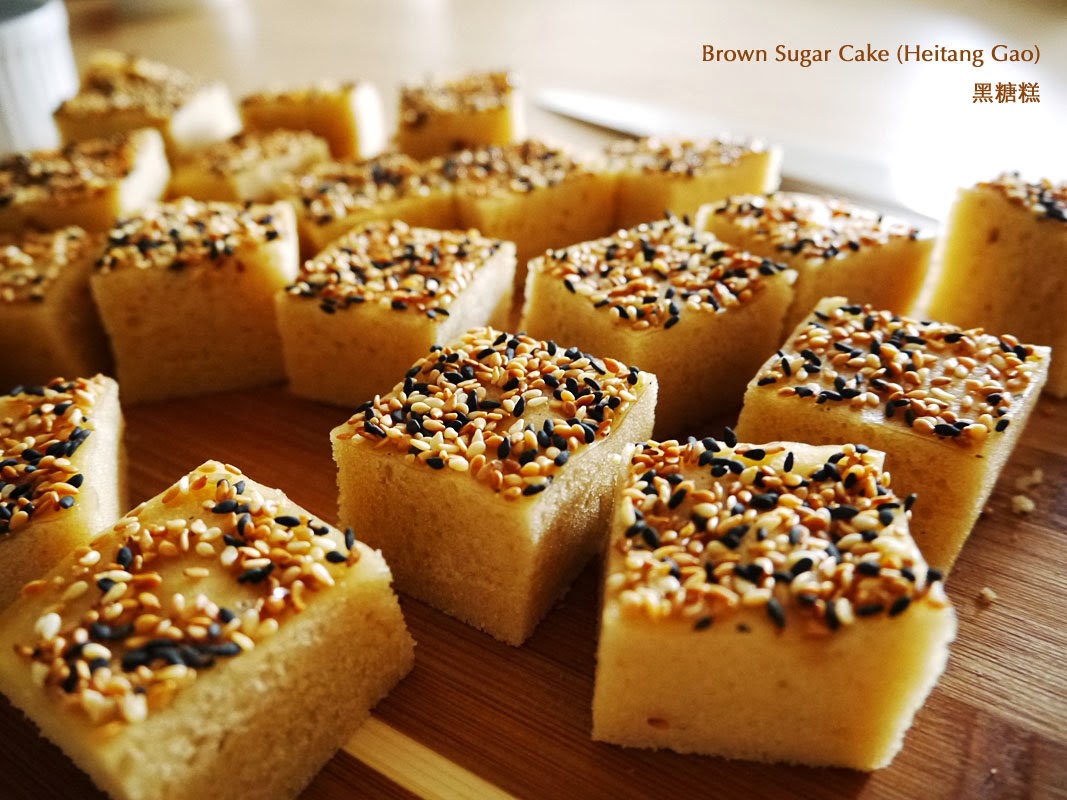
黑糖糕 Brown Sugar Cake (Heitang Gao)


"Brown-sugar cake is a type of leavened cake. To Chinese speakers, leavening is often associated with “becoming prosperous.” As such, this cake is usually served during the Lunar New Year holidays. Brown-sugar cake is a favorite gift item from Penghu." -- an introduction from Taiwan Food Culture.

I will always want to have some brown sugar cake when visiting Penghu or Chun Shui Tang. The interesting part is that when I was in Taiwan, I'd never thought about making it myself.

The brown sugar I used here is gold-brown, so the cake doesn't come out with dark color, and the fragrance of brown sugar is light, just all right. Well, the texture is right, spongy and chewy. Maybe next time if I want a stronger flavor and darker color, I can try finding the real Okinawa brown sugar in Japanese supermarket.

「黑糖糕屬於發糕的一種,發糕亦有發財之意,是過年常見的吉祥供品,如今已是澎湖最佳伴手禮之一。」 -- 來自臺灣美食文化網的簡介。

每次去澎湖玩或是去春水堂的時候總會想要嚐嚐黑糖糕,但是人在台灣的時候卻從來沒想過要自己做耶!

這次用的黑糖顏色比較淡,做出來的黑糖糕顏色自然也比較淺,黑糖味也是淡淡的,還可以。口感方面是很對,QQ的。如果想吃黑糖味更重、顏色更深的黑糖糕,或許可以去日本超市找找看沖繩黑糖。


Brown Sugar Cake (Heitang Gao)
Recipe adapted from Jane

Ingredients:
  • brown sugar 120 g
  • water 90 g, plus more
  • honey 20 g
  • all-purpose flour 180 g
  • tapioca flour 70 g
  • baking powder 9 g
  • baking soda 2 g
  • vegetable oil 15 g


Directions:
  1. Mix and sift all-purpose flour, tapioca flour, baking powder and baking soda.
  2. Dissolve and heat brown sugar in water 90 g on stovetop and bring to a boil. Reduce the heat and simmer for 5 minutes to bring out the best flavor of brown sugar. Add honey and mix well. Heat for 1 minute then remove from heat.
  3. Add cool water to brown sugar mixture to make a total 410 g.
  4. Mix sugar water with sifted dry ingredients and vegetable oil.
  5. Pour into a 9-inch round pan (or 8-inch square pan) and gently bang the pan for a few times to eliminate big bubbles. Steam on medium heat for 25 minutes (count from boiling.)
  6. Sprinkle with roasted sesame seeds and let it cool in the pan before slicing.


黑糖糕
食譜改自妃娟

材料:
  • 黑糖 120 克
  • 水 90 克,以及適量
  • 蜂蜜 20 克
  • 中筋麵粉 180 克
  • 樹薯粉 70 克
  • 泡打粉 9 克
  • 小蘇打粉 2 克
  • 蔬菜油 15 克


做法:
  1. 將四種乾粉類混合過篩。
  2. 黑糖和水 90 克混合,在爐子上加熱到滾,轉小火續煮 5 分鐘帶出黑糖香味。加入蜂蜜溶解,煮 1分鐘,關火。
  3. 將黑糖蜜加入適量冷水使得總重量達到 410 克。
  4. 黑糖水與乾粉類、蔬菜油混合均勻。
  5. 麵糊倒入 9吋蛋糕模(或 8吋方形烤盤),在桌面上輕敲幾下排出大氣泡。中火蒸 25分鐘(水滾後開始計時。)
  6. 撒上熟芝麻,連同模子一起放涼再脫模切塊。

Pin It

1/13/2014

葵花籽枸杞麵包 Sunflower Seeds Goji Bread


Goji is often used in Chinese congee and soup, mostly with other herbs. That's why when I think of goji, there's always a memory of slightly sweet and bitter taste -- it doesn't come from goji but other herbs. 

But when used in bread, goji is just dried berries. 


枸杞通常用在中式的粥品或湯品,而且常常會和其他中藥材一起用。我想這是為什麼每次想到枸杞,記憶中總是有微甘微苦的滋味,那其實不是來自枸杞,而是其他藥材。

但當用來做麵包的時候,枸杞其實就是乾燥的莓果類呀!


Nice chewy crumb. Nice flavor. | 有嚼勁的組織,味道很好喔


Sunflower Seeds Goji Bread

Ingredients:
  • an 1-pound dough of European peasant bread, or can use any kind of bread dough
  • sunflower seeds, toasted at 350F for 6-8 minutes, I used about 25 grams.
  • goji, I used 15 grams.


Directions:
  1. After 1st rise (or take it out from refrigerator,) scrap the dough out and flatten it.
  2. Spread sunflower seeds and goji evenly onto the dough. Gently roll it up.
  3. Put the dough on a baking sheet, seam side down. Cover with plastic wrap and let it sit for 70-90 minutes.
  4. Preheat the oven at 450F. Dust and slash the dough. Put the dough in and use a water sprayer to create steam in the oven. Shut the door and spray again in 30 seconds. Repeat twice. Bake for a total 30 minutes.
  5. Let it cool.


葵花籽枸杞麵包

材料:
  • 歐洲鄉村麵包的麵團一份,也可以使用任何一種麵包麵團
  • 葵花籽,以 350F/175C 烘烤 6-8分鐘,我用了大約 25克
  • 枸杞,我用了約 15克


做法:
  1. 麵團第一次發酵完成後(或是從冰箱中拿出來之後),將它刮到桌面上並推壓成平面。 
  2. 將葵花籽和枸杞均勻鋪上,輕輕捲起。 
  3. 將麵團放到烤盤上,接合處朝下,用保鮮膜覆蓋靜置 70-90分鐘。 
  4. 烤箱預熱 450F/230C。麵團表面撒些麵粉、用刀劃線,放入烤箱。往烤箱內壁噴幾下水,迅速關上烤箱門將蒸汽關在裡面,30秒後再次噴水、關上烤箱門,共重複二次。總共烘烤 30分鐘。 
  5. 出爐後在架上放涼。 


Pin It

1/12/2014

烤吉拿棒 Baked Churros


Oh churros! Of course baked version is not as crispy as fried. But they're lighter, healthier. Eat them when still warm with cinnamon sugar, they're satisfying enough! I also tried pan-frying and it worked as well. 

I left some of them naked for my toddler and husband. Too much sugar consumption is not good for little kids. And my hubby, he's not a fan of cinnamon. These churros taste fine without it.

吉拿棒!!當然用烤的不像用炸的那麼香酥,但是比較清爽健康。還溫溫的時候裹著肉桂糖吃,也夠解饞了!我還另外試了用平底鍋煎,效果也還OK喔。

我沒有全部都上肉桂糖,一方面不想讓兒子吃太多糖份,一方面是我老公不愛肉桂。單吃也還不錯啦,有點像略帶點鹹味的小小雞蛋糕。


Pan-fried. | 平底鍋煎的效果。

Pan-fried, coated with cinnamon sugar. | 平底鍋煎,裹上肉桂糖。

Before baking. | 進爐烘烤前。


Baked Churros (yields 16-20 4" churros)

Ingredients:
  • water 2/3 cup
  • unsalted butter 2/3 sticks (75 g)
  • salt 1/3 teaspoon
  • all-purpose flour 2/3 cup (83 g)
  • egg 2
  • vanilla 2/3 teaspoon
  • cinnamon sugar 1/3 cup


Directions:
  1. Preheat the oven at 350F.
  2. In a medium sauce pan melt and mix water, butter, and salt. Bring to a boil and remove from heat.
  3. Add flour and mix until well combined.
  4. Add one egg at a time. Mix until smooth before adding another egg.
  5. After all the eggs are added and mixed well, mix in vanilla.
  6. Spoon the mixture into a pastry bag with a large star tip. Pipe 4" sticks on a baking sheet.
  7. Bake for 20 minutes. For my oven they're best at 22-23 minutes.
  8. Coat with cinnamon sugar as desired.


烤吉拿棒(約 16-20根 4吋吉拿棒)
食譜修改自 Confessions of a City Eater

材料:
  • 水 2/3 杯 (156 ml)
  • 無鹽奶油 2/3 根 (75 g)
  • 鹽 1/3 小匙
  • 中筋麵粉 2/3 杯 (83 g)
  • 雞蛋 2 顆
  • 香草精 2/3 小匙
  • 肉桂糖 1/3 杯,或依個人口味增減


做法:
  1. 烤箱預熱 350F/180C
  2. 在鍋子中將水、奶油、鹽加熱混合,煮滾後熄火。
  3. 加入麵粉,混合均勻。
  4. 一次加入一顆雞蛋,混合均勻。
  5. 所有雞蛋都加入並攪勻之後,加入香草精。
  6. 將麵糊裝入擠花袋,以星形大擠花嘴在烤盤上擠出 4吋長的條狀。
  7. 放入烤箱烘烤 20分鐘。(我的烤箱多烤 2-3分鐘比較剛好)(也可以用平底鍋煎,鍋熱之後以中小火煎到兩面金黃,不用加油!)
  8. 依個人喜好裹上肉桂糖。


Pin It

1/09/2014

茄汁雞翅 Ketchup Wings


這份食譜是改編自松露玫瑰的「拯救小廚房的烤箱 100道」,松露姊姊的食譜都很淺顯易懂,成功率也很高喔!

Pin It
Related Posts Plugin for WordPress, Blogger...