
3/20/2014


3/18/2014
英式瑪芬麵包 English Muffins (Alton Brown's Recipe)


不同食譜比較 Comparison:
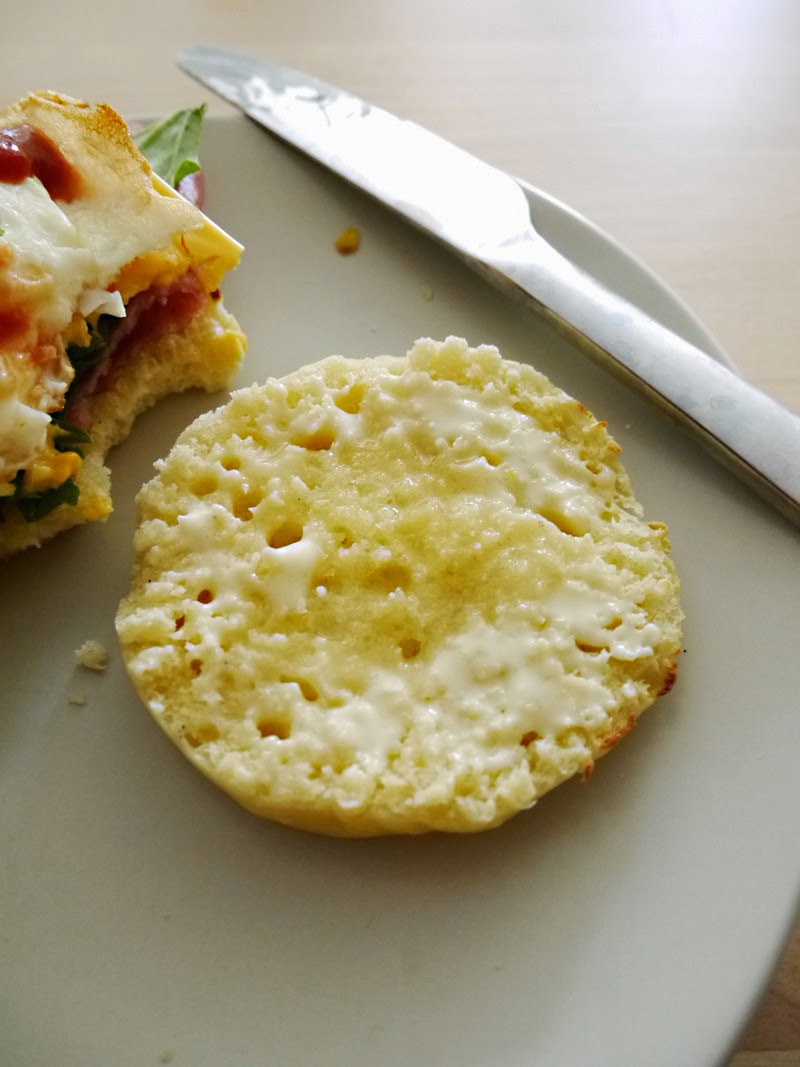
這就是喜歡英式瑪芬的人們在說的「坑坑洞洞」,那些融化奶油會流進去的小洞啊!迷人之處就在這裡。
我覺得這個麵團並不是一般想像中的「麵團」,說是「麵糊」還比較恰當。稍微算一下就會發現它的含水量超過 100%。烘焙時其中重要的一環就是比例了吧!不同的麵粉液體比例,就創造出數不清的烘焙品種類,更不用說再加上油脂、糖分、穀物、堅果、種子、香料、蛋、甚至蔬菜水果等其他材料了。這也是烘焙讓我著迷之處,千變萬化呀!
處理這麼個麵糊狀的麵團,金屬圓圈模是必須的。我之前試做過一次,試圖用紙和鋁箔紙自製圈圈模,但太軟了,沒辦法用在這份食譜;所以我就訂了些模具,之後也可以拿來做漢堡麵包、比斯吉等等。如果家裡沒有模具,也不想花錢買,網路上很多人建議可以用兩邊都挖空的鮪魚罐頭、自製罐頭用的那種寬口金屬圈。
說了這麼多,這吃起來如何?最重要的「坑坑洞洞」是出現了沒錯,但我覺得酵母味太重、奶味也太重。下次要繼續嘗試另一份食譜,用比較少的酵母,以及單純用水,而不是牛奶。
This is what people are talking about, almost. "Nooks and crannies," those little holes that are supposed to pool melted butter. Yum!
The dough is not really a dough as you think, I'll say. It's more batter than bread dough. If you do the math you'll find it over 100% hydration. It's always about the ratio. With different ratios of flour to liquid, numerous types of baking goods are created. Not to mention other ingredients like fat, sweeteners, grains, nuts, seeds, herbs, eggs, and even fruits and vegetables. I found that the most enjoyable part of baking, endless possibilities.
So with a batter kind of dough, metal rings are suggested. I tempted to do it with DIY rings made from paper and foil, but that was too soft for this recipe. So I got myself some real metal rings, thinking about versatile uses like making hamburger buns and large biscuit. If you don't have rings and don't want to get some, tuna cans (with both ends removed) and wide-mouth canning rings are also suggested as you can see on the internet.
Oh and the results? Yes, there are the most wanted nooks and crannies. But I found it somehow too yeasty and also too "rich." Next time I'll try another recipe using less yeast and simply water rather than milk.
 |
| 塗上奶油 | With butter! |
英式瑪芬麵包(8-10個)
材料:
- 熱牛奶 1 杯
- 鹽 1/2 小匙
- 糖 1 大匙
- 無鹽奶油 1 大匙
- 乾酵母 2 1/4 小匙(1小包)
- 糖 1/8 小匙
- 溫牛奶 1/3 杯
- 中筋麵粉 2 杯
- 鹽 1/2 小匙
- 液態植物油 適量,塗模具用
- 直徑 3 1/2吋金屬圓圈模 數個
做法:
- 將熱牛奶、鹽 1/2 小匙、糖 1 大匙、奶油混合,攪拌均勻讓鹽和糖溶解。放涼。
- 乾酵母和糖 1/8 小匙加入溫牛奶攪勻。
- 步驟 1放涼後加入步驟 2,加入麵粉拌勻成麵糊。
- 加蓋靜置室溫 45-60分鐘。加入剩餘的 1/2 小匙鹽,拌勻。
- 平底鍋加熱,圓圈模塗上薄薄一層油脂,放入鍋中。
- 用 1/4 杯的量杯,舀滿滿 1/4 杯的麵糊到每個模具中。鍋蓋蓋上,中火到中小火加熱 8分鐘。用夾子翻面,蓋上鍋蓋再煎 8分鐘。
- 煎好的瑪芬移到架上、將模具移除,瑪芬放涼。繼續煎剩下的麵糊。
- 用叉子將瑪芬分開,不要用麵包刀,才能保留那些最美味的坑洞!
English Muffins (8-10 muffins)
Adapted from Alton Brown English Muffins Recipe on Food Network
Ingredients:
- milk 1 cup, hot
- salt 1/2 teaspoon
- sugar 1 Tablespoon
- butter 1 Tablespoon
- active dry yeast 2 1/4 teaspoons (1 envelope)
- sugar 1/8 teaspoon
- milk 1/3 cup, warm
- all-purpose flour 2 cups
- salt 1/2 teaspoon
- vegetable oil for greasing rings
- 3 1/2-inch metal rings
Directions:
- Mix hot milk 1 cup, salt 1/2 teaspoon, sugar 1 Tablespoon, and butter. Stir until salt and sugar are dissolved. Set aside to cool.
- Dissolve yeast and sugar 1/8 teaspoon in warm milk.
- Make sure the butter-milk mixture is cool enough and add it to the yeast-milk. Add flour and stir to form a batter-like dough.
- Cover and let it rise for 45-60 minutes. After rising, add the remaining 1/2 teaspoon of salt and mix well.
- Heat a pan on medium. Lightly grease the metal rings and put them in the pan.
- Use a 1/4 cup to scoop generously 1/4 cup of batter into each ring. Cover and cook on medium to medium-low for 8 minutes. Flip using tongs, cover keep cooking for anther 8 minutes.
- Place muffins on a rack, remove the rings and let cool. Repeat with remaining batter.
- Split with fork so you can keep those "nooks and crannies!"

 |
| 塗了奶油再加蜂蜜也很美味 | Butter and honey? Nom nom... |
3/17/2014
英式瑪芬麵包 English Muffins (Peter Reinhart's Recipe)

不同食譜比較 Comparison:
這個食譜的結果我不喜歡,做出來的英式瑪芬麵包(滿福堡)就像一般的麵包口感。我覺得英式瑪芬就是應該要有粗粗脆脆的外皮、QQ的內身呀!那些美妙的「坑坑洞洞」都到哪兒去了?
正在持續試做其他食譜,期待有好結果。
Well, I'm not satisfied with this recipe. It makes bread-like english muffins. But in my opinion, english muffins should have crisp crust and chewy crumb. All those "nooks and crannies," where are they?
I'm experimenting with other recipes and will post when I have good results.

 |
| 手邊沒有玉米碎粒,用麥麩也是可以啦 | I didn't have cornmeal, so used wheat bran instead. |

英式瑪芬麵包(6-8個)
修改自 Peter Reinhart在 The Bread Baker's Apprentice當中的食譜
材料:
- 高筋麵粉 2 1/4杯
- 糖 1/2大匙
- 鹽 3/4小匙
- 乾酵母 1 7/8小匙
- 無鹽奶油 1大匙
- 牛奶 210ml + 醋 30ml
- 玉米碎粒
做法概要:
- 麵團揉好之後第一次發酵 90分鐘,然後分成 6-8塊。
- 滾圓後稍微壓扁,兩面粘上玉米碎粒,放烤盤上二次發酵 90分鐘。
- 烤箱預熱 350F/175C。在爐子上以平底鍋中火兩面各乾煎 5-8分鐘,送入烤箱再烤 5-8分鐘。
English Muffins (makes 6-8 muffins)
Adapted from Peter Reinhart's recipe in The Bread Baker's Apprentice
Ingredients:
- bread flour 2 1/4 cups
- sugar 1/2 Tablespoon
- salt 3/4 teaspoon
- active dry yeast 1 7/8 teaspoons
- butter 1 Tablespoon
- milk 7 ounces + vinegar 1 ounce
- cornmeal for dusting
Summarized Directions:
- After kneading and a 90-minute rise, divide the dough into 6-8.
- Shape into rolls and press a little. Roll with cornmeal on both sides and let the doughs rest on baking sheet for 90 minutes.
- Preheat oven at 350F/175C. Cook the dough in a pan on stovetop for 5-8 minutes each side. Bake immediately in the oven for another 5-8 minutes.
3/14/2014
蘋果紅棗雞湯 Chicken Soup with Apple & Jujube

這是一道我家那煮什麼吃什麼的先生會主動點餐的雞湯,原始的食譜來自矽谷美味人妻。
一開始是因為 KT在這道菜名上加了「美容」兩字,又有「蘋果」、「紅」棗等字眼,讓人直覺想到白裡透紅的好氣色,所以就有這麼個印象擱在心上;後來某次買到兩顆不好吃的蘋果,偏乾澀、缺少香氣,乾脆拿來入菜好了。
這一試成主顧,真好吃!
如果使用的是已經切好的雞肉,那這道湯品真是省事無比,所有材料入鍋一個小時就有好湯上桌;美味程度呢?我家先生說他覺得可以當年菜呢!
My husband literally eats everything I cook. This soup is something he'll suggest when I want to make chicken soup. The original recipe is from KT (in Chinese.)
KT named it with keywords like "good to skin beauty," so it got my attention. Then there was a time we got 2 apples which were not that good, kind of dry, lack of fragrance. So I used them in cooking.
Wow, amazing!
If using pre-cut chicken, this soup can be done in an hour. It is so delicious that my husband thinks it could be on Chinese New Year's table.

蘋果紅棗雞湯
材料:
- 雞 半隻,切塊(不切也行啦)
- 蘋果 1 顆,去皮去核切大塊
- 紅棗 7-8 顆
- 薑片 3-5 片
- 米酒 2-3 大匙
- 水 適量,蓋過食材就好
- 鹽 適量
做法:
- 雞肉放入冷水鍋中,大火加熱到剛好滾,離火倒掉濁水,在流動清水下將雞肉表面沖洗乾淨。
- 雞肉放回鍋中,放入蘋果、紅棗、薑片,加入米酒,倒入蓋過食材的冷水,加蓋大火加熱到滾。
- 水滾之後維持在大滾的狀態 40分鐘,可適當調整火候以免湯水溢出,有需要時開蓋撈掉浮沫。
- 40分鐘後轉成中小火續煮 20分鐘,煮好後加入適量的鹽調味即可。
Chicken Soup with Apple & Jujube
Adapted from KT's blog
Ingredients:
- half chicken
- apple 1, peel, core, and cut into chunks
- dried jujube 7-8
- fresh ginger root 3-5 slices
- rice wine 2-3 Tablespoons
- water
- salt to taste
Directions:
- In a stock pot filled with cold water, put chicken in, and bring to a boil over high heat. Pour away the water and wash the chicken under running water. By doing so the soup will be clearer.
- In the same pot, put in chicken, apple, jujubes , ginger slices, add rice wine, then add water to just above all the ingredients. Cover and bring to a boil on high.
- Keep the soup at a rapid boil for 40 minutes. Adjust heat if need to avoid a boil over. Skim the scum as needed.
- After 40-minute boil, lower the heat to medium-low and simmer for another 20 minutes. Season with salt to taste.
3/12/2014
鹹蛋糕 Savory Steamed Cake

台灣滿多料理小吃都是鹹中帶甜的滋味,食譜中也常常看到糖的出現,尤其是有用到醬油的時候。
蒸的鹹蛋糕做法很簡單,配料可以千變萬化。我看過有用肉臊、油蔥酥、起司、各種蔬菜、培根... 可以好好運用想像力!
這次我用了蔥花和肉鬆,還有一些紅蘿蔔絲是要給兒子吃的,因為我還不想讓他吃肉鬆這種加工品。
不知道這種味道是不是就是日文說的「umami」?管他的,好吃就好...
In Taiwan, people love food tastes savory and sweet at the same time. Just like you'll find sugar in most Chinese recipes, especially along with soy sauce.
This steamed cake is easy to make, and I believe there are infinite variations -- you can put whatever toppings you like. I've seen recipes with Taiwanese minced pork, fried shallots, cheese, vegetables, bacon... Can't wait to try them!
This time I put green onion and pork sung, also grated carrot for my toddler (since I don't want him to eat pork sung, which is processed.)
I'm not sure if this is what the Japanese say "umami." Can we just eat without tempting to find out the exact answer?
 |
| 沒有肉鬆的這邊是兒子的紅蘿蔔口味 | The one-third without pork sung is for my toddler. |
鹹蛋糕(12兩土司模或是 8吋圓模)
材料:
- 雞蛋 4顆,室溫
- 糖 120 克
- 低筋麵粉 140 克(或是中筋麵粉 122 克+玉米粉/太白粉 18 克)
- 鹽 2 克
- 泡打粉 3 克(可省略)
- 配料(蔥 3支切碎、肉鬆、紅蘿蔔絲、芝麻、鹽)
做法:
- 準備好蒸籠,裝水加熱到溫溫的。模具塗油或是鋪上烘焙紙。
- 麵粉、鹽、泡打粉一起過篩。
- 取一個大碗將雞蛋和 1/3的糖打散,繼續分次加入剩餘的糖並高速打發,直到攪拌器舉起麵糊滴下有明顯的褶子,體積增為三倍大,而且顏色泛白。
- 蒸籠水再次加熱。
- 加入 1/3的麵粉,輕輕大動作拌勻,重複此步驟拌入所有的麵粉。
- 將一半的麵糊倒入烤模,放入蒸籠用中大火蒸 10分鐘。
- 蛋糕在蒸的同時準備配料,將蔥花、紅蘿蔔、芝麻和少許油、鹽拌勻,肉鬆準備好在一旁。
- 輕輕將一半的配料鋪到蛋糕上,倒入剩餘的麵糊,再把另一半配料輕輕鋪在最上面。
- 同樣以中大火繼續蒸 20分鐘。
- 將蛋糕從蒸籠中取出,在模具中靜置 10分鐘再脫模,完全放涼。
Savory Steamed Cake (a 9x5 loaf or 8" round cake)
Ingredients:
- eggs 4, at room temperature
- sugar 120 g
- cake flour 140 g (or all-purpose flour 122 g + cornstarch 18 g)
- salt 2 g
- baking powder 3 g (optional)
- toppings (green onion 3 stalks chopped, pork sung, grated carrot, sesame seeds, salt.)
Directions:
- Prepare a steamer with water. Heat the water to warm. Grease or line a loaf pan or cake pan.
- Sift flour, salt, baking powder together.
- In a large mixing bowl beat the eggs with 1/3 of the sugar until bubbly. Keep beating on high and gradually add the remaining sugar. Beat until the ribbons, triple in volume and pale.
- Heat the steamer to bring to a boil.
- Gently fold in 1/3 of the flour into egg mixture. Repeat to fold all the remaining flour in.
- Pour half the cake batter into the pan. Steam on medium-high for 10 minutes.
- While the cake is being steamed, prepare the toppings. Mix green onion, carrot, and sesame with a little oil and salt. Have the pork sung nearby.
- Gently spread half the toppings onto the steamed cake. Pour the remaining batter, and top with the remaining toppings.
- Steam for another 20 minutes on medium-high.
- Let the cake cool in its pan for 10 minutes before unmold and let cool completely.


3/11/2014
廚房女神奈潔拉:烤菠菜,瑞可達起司和肉豆蔻 Nigellissima: Spinach Baked with Ricotta & Nutmeg

最近正在想著要讓全家人吃多一點蔬菜,但是除了中式快炒之外其他的烹調方式我都不是很熟悉;因此當我在書中看到這個食譜時,馬上就列入待做菜單當中。
而且我也在激勵自己不要因為缺少某些材料就不去嘗試,就買啊!不然就查查看有沒有替代品(但是用替代品或是直接省略,就不能抱有太大的期望成果會一模一樣。)這次我就認識了瑞可達起司。
I'm trying to get myself and my family eat more vegetables recently. But I'm not familiar with different cooking method other than Chinese stir-fry. So when I read this recipe in the book, I listed it as recipes-to-try.
And I'm not letting myself shy away from trying a new recipe just because the lack of some ingredients. Just get them or find substitutes (but don't expect the very same results.) In this case, I got to know ricotta cheese.

 |
| 簡單又好吃,(又美麗!)這個烹調方法值得學起來 Easy, tasty, and pretty!! A keeper. |
烤菠菜,瑞可達起司和肉豆蔻
修改自奈潔拉的食譜:廚房女神奈潔拉 義式美味快速上桌 p.115
材料:
- 橄欖油 1大匙
- 大蒜 1瓣,切碎或壓成泥
- 嫩菠菜和其他綜合葉菜 150克
- 蘆筍 150克,去硬皮,切成一口大小
- 苦艾酒 2大匙
- 帕馬森起司 3大匙
- 瑞可達起司 2大匙
- 鹽、胡椒 適量
- 肉豆蔻粉 適量
- 雞蛋 2顆,打散
做法:
- 烤箱預熱 400F/200C。烤盤抹油。
- 在爐子上加熱橄欖油、蒜末,葉菜和蘆筍入鍋炒到軟。
- 加入苦艾酒,繼續拌炒到葉菜縮小。關火。
- 拌入所有其他材料,倒入烤盤、送入烤箱烤 10分鐘。
- 靜置 5分鐘再享用。
Spinach Baked with Ricotta & Nutmeg
Adapted from Nigella's recipe in Nigellissima: Instant Italian Inspiration
Ingredients:
- olive oil 1 Tablespoon
- garlic 1 clove, minced
- baby spinach and mixed greens 150 g
- tender asparagus 150 g, peel and cut into bite size.
- dry vermouth 2 Tablespoons
- grated parmesan 3 Tablespoons
- ricotta cheese 2 Tablespoons
- salt & pepper
- ground nutmeg
- eggs 2, beaten
Directions:
- Preheat the oven to 400F/200C. Grease a baking pan.
- Heat the oil and garlic on stovetop, then stir-fry the greens and asparagus until they softened.
- Add the vermouth. Keep stir-frying until the vegetables shrink. Remove from heat.
- Add all the other ingredients. Pour into the baking pan and bake for 10 minutes.
- Let it sit for 5 minutes before serving.
 |
| 和義大利麵拌一拌,就是我和兒子的蔬菜多多午餐。 Served with some campanlle, this is our lunch loaded with vegetables! |
燕麥餅乾 Oatmeal Cookies
 |
| 如果不用叉子把麵團壓扁也沒關係,烤出來會比較小塊、比較厚,像左下角那塊。 If you don't press the dough with fork, that's fine. You'll get small, thick cookies, like the one at the lower-left corner. |
突然間很想吃燕麥餅乾,上一次做是...快兩年前啦!還好當時我有把食譜記錄在另一個部落格,那時候除了食譜之外主要是記些來到加州的新生活、以及後來的懷孕日記;還好我有記起來呀,需要的時候就找得到自己的食譜,還有那些珍貴的心得與筆記。
這次也做了些調整,主要是減少糖的用量。嗯~好好吃!做法簡單、過程快速,一家人都愛吃。
你能了解那種發現盒子裡的餅乾會自己自動消失的喜悅嗎?
Suddenly I have this craving for oatmeal cookies. Last time I made them is... almost 2 years ago. I posted the recipe on another blog where I kept life in California and my pregnancy journal -- I'm glad I did so, therefore I can find my own recipes and those precious notes and comments.
Made some adaptions this time, mostly reduced the sugar amount. Nom nom nom. I love it, easy to make, quick to bake. Everybody enjoys it.
Can you relate the delight in finding the cookies in the box are disappearing automatically?
 |
| 一回神才發現已經吃了 6片... | When I noticed I already gobbled up 6 pieces... |
燕麥餅乾(約 36片)
材料:
- 無鹽奶油 1條(1/2杯)室溫軟化
- 黑糖 密實的 1/3杯
- 白糖 1/2 杯
- 雞蛋 1個
- 香草精 1/2 小匙
- 中筋麵粉 3/4杯
- 鹽 1/2小匙
- 小蘇打 1/2小匙
- 核桃 2/3杯,切碎塊
- 燕麥片 3/4杯 以及 燕麥片 3/8杯+烘焙用巧克力片 1/2杯
做法:
- 烤箱預熱 350F/175C。烤盤鋪上烘焙紙。
- 軟化的奶油和糖一起攪打成泛白霜狀。
- 加入雞蛋、香草精,打勻。
- 拌入麵粉、鹽、小蘇打。
- 加入核桃混合。
- 將麵團分成 2份,其中一份加入燕麥 3/4杯,另一份加入燕麥 3/8杯和巧克力片。
- 將麵團一大匙、一大匙的舀到烤盤上,用叉子壓扁,送入烤箱烘烤 10-12分鐘或是烤到金黃上色。
- 出爐的餅乾放到架子上放涼(涼了才會變硬),繼續烤剩下的麵團。
- 用保鮮盒或夾鏈袋保存可以放一星期。
Oatmeal Cookies (makes about 36 cookies)
Ingredients:
- butter 1 stick (1/2 cup,) softened
- brown sugar 1/3 cup, packed
- sugar 1/3 cup
- egg 1
- vanilla extract 1/2 teaspoon
- all-purpose flour 3/4 cup
- salt 1/2 teaspoon
- baking soda 1/2 teaspoon
- walnuts 2/3 cup, chopped
- old-fashioned oats 3/4 cup & oats 3/8 cup + chocolate chips 1/2 cup
Directions:
- Preheat the oven to 350F/175C. Line a baking sheet with parchment paper.
- Cream butter and sugars together.
- Add the egg, vanilla extract. Beat to combine.
- Mix in flour, salt, soda.
- Add walnuts and mix.
- Divide the dough into 2. Add oat 3/4 cup to one of the dough, and oats 3/8 cup + chocolate chips to another.
- Scoop tablespoonfuls onto the baking sheet. Press each cookie dough with a fork. Bake for 10-12 minutes or until golden.
- Let the cookies cool on a rack. Keep baking with the remaining dough.
- Store in air-tight containers or zip bags for up to 1 week.
3/04/2014
起司吐司 Braided Cheese Bread

也看看這 Also read: Herbs Garlic Cheese Bread | 香蒜起司吐司
This is a beautiful loaf, my first braided bread. But it tastes not good enough. I kept imagining that there will be a savory taste - salty and garlicky, but there isn't. Next time I should add some minced garlic, salt and pepper, or herbs. And I should use butter instead of vegetable oil to enhance the flavor.
Well, let's just pretend it is a simple and plain sandwich loaf, with a hint of cheese.
這條吐司很美,是我第一次做辮子造型的麵包。但是味道方面還差強人意。我一直覺得這條吐司應該要有鹹香的味道,像是蒜味之類的,但是沒有(因為沒放蒜末啊!)下回我要加一些蒜末、撒些鹽和胡椒、或是加入一些香料。而且這次用的是植物油,改用奶油應該也會比較香。
那這次就當做是做了條,帶有點起司味的白土司吧。

Braided Cheese Bread (9" loaf.)
Ingredients:
- Old dough (pâte fermentée) 100-120 g, tear or cut into small pieces.
- wheat germ 40 g
- bread flour 255 g
- active dry yeast 5 g
- salt 4 g
- sugar 20 g
- water 183 g
vegetable oil 20 g(should have used butter)- grated cheese of your choice
- Mix old dough, wheat germ, bread flour, yeast, salt, and sugar together. Add water, and mix or knead to form a dough.
- When the dough is formed, knead it for 2-3 minutes until a little elastic. Add the oil/butter.
- Knead until the dough is very smooth and elastic, almost the windowpane stage.
- Cover and let it rise for 2 hours at room temperature.
- Scrap the dough out and punch down. Roll it out to a flat rectangle. Spread the cheese all over it. Roll up.
- Cut the roll-up dough into 2, lengthwise. Pinch one end together. Gently braid the loaf by placing one half onto another repeatedly.
- Place the braided loaf in a 9" loaf pan. Cover with damp cloth and let it rise for 1 hour or until just as high as the pan.
- Preheat the oven to 350F. Bake for 32 minutes.
- Let it cool completely before slicing.
起司吐司(12兩)
材料:
- 老麵 100-120 克,分成小塊
- 小麥胚芽 40 克
- 高筋麵粉 255 克
- 乾酵母 5 克
- 鹽 4 克
- 糖 20 克
- 水 183 克
液態植物油 20 克(應該要用奶油)- 喜歡的起司,刨絲
- 將老麵、小麥胚芽、高筋麵粉、酵母、鹽、糖混合,加入水,攪拌均勻成團。
- 麵團成團之後,手揉 2-3分鐘,然後加入油/奶油。
- 繼續搓揉直到麵團光滑有彈性,快要可以撐出薄膜。
- 加蓋,室溫發酵 2小時。
- 將麵團刮出,輕壓排氣。桿開成大大一片長方形,鋪上起司、輕輕捲起。
- 將麵團卷縱向切開成 2長條,將一頭稍微捏合,然後 2長條輕輕扭轉成麻花辮。
- 麵團放入吐司模,以濕布或保鮮膜覆蓋,室溫發酵 1小時或直到和烤模同高。
- 烤箱預熱 350F/176C,烘烤 32分鐘。
- 涼透了再切片。


3/02/2014
廚房女神奈潔拉:肉披薩 Nigellissima: Meatzza

I can't believe how delicious this is when I was reading the recipe. It's so easy to prepare and can be done in 30 minutes. It's a keeper!! And I'm gonna cook some rice or pasta next time. Or just use a slice of bread!
Oh I love the bold but fresh taste which only comes from real, natural food.
Ground meat (I used half beef, half pork,) oatmeal, eggs, garlic, parsley, parmesan, salt & pepper. Chopped tomatoes, garlic, oil, oregano, salt & pepper. Mozzarella and basil.
Looks like a long list of ingredients, but believe me, you'll need those spices and herbs.
(I topped it with some chopped basil before baking, and the basil turned darker. I don't care. But next time I'll mix the basil with tomatoes.)
在看食譜的時候實在沒想到這道會這麼美味!備料簡單、又很快速,30分鐘內就可以上桌。這當然要收藏起來變成家常菜啊!下次我要配點飯或是義大利麵,吐司也行啦!
最近真的是很愛這種只有天然食材才有、既濃郁又舒爽的味道。
絞肉(我用牛豬各半)、燕麥、雞蛋、大蒜、巴西利、帕馬森起司、鹽和胡椒。番茄碎塊、大蒜、油、奧勒岡、鹽和胡椒。馬芝拉起司、羅勒。
看起來有點長的食材清單,但那些香料是不可或缺的。
(我把一些羅勒切碎一起進爐烤,顏色就變深了。我是不介意啦,不過下次要把羅勒和番茄拌在一起,比較美。)
原版食譜:肉披薩,廚房女神奈潔拉 義式美味快速上桌 p.72
訂閱:
文章 (Atom)