12/27/2013

酪乳麵包 Buttermilk Bread


No-knead bread can be soft, as long as the baking temperature is lowered. And preferably there will be dairy, sugar, or eggs in the dough.  My first try are some rolls made with a challah dough for a Christmas trip to Lake Tahoe. This is my second and I love it. It's not pillow-soft, but truly softer than artisan bread. The interior is a little like english muffins to me.

I don't buy buttermilk. What usually done is adding 1 tablespoon of vinegar or lemon juice to a cup of milk as a substitute.

免揉麵包也可以是軟軟的,烘烤溫度降低就可以達到這個效果,而且較柔軟的麵包通常麵團中會有乳製品、糖、雞蛋等材料。我第一次做免揉軟麵包是為了聖誕節去太浩湖旅遊而用 challah麵團(有加奶油、雞蛋、糖)做了幾個麵包卷,這是第二次嘗試,還挺滿意的。這顆麵包不是超級柔軟的那種,但它的確比一般歐式麵包還要軟了,我覺得內身的口感有點像英式馬芬麵包/滿福堡。

通常我不買酪乳,但可以用 1大匙的醋或檸檬汁和大約 1杯的鮮奶混合來替代。(酪乳是製造奶油剩下的液體,也可指所有發酵乳類,脂肪含量比一般牛奶還要低,它是酸的,因此常見於快速麵包等有用到小蘇打的烘焙食譜中。)


Buttermilk Bread (1 big loaf)
Recipe adapted from The New Artisan Bread in Five Minutes a Day by Jeff Hertzberg and Zoë François

Ingredients:

  • water 228 g
  • buttermilk 120 g (vinegar or lemon juice 8 g + milk 112 g)
  • yeast 5 g
  • salt 8 g
  • sugar 10 g
  • all-purpose flour 460 g


Directions:
  1. Mix all the ingredients and let it rise for at most 2 hours.
  2. Put the dough into fridge for up to 5 days or use it right away.
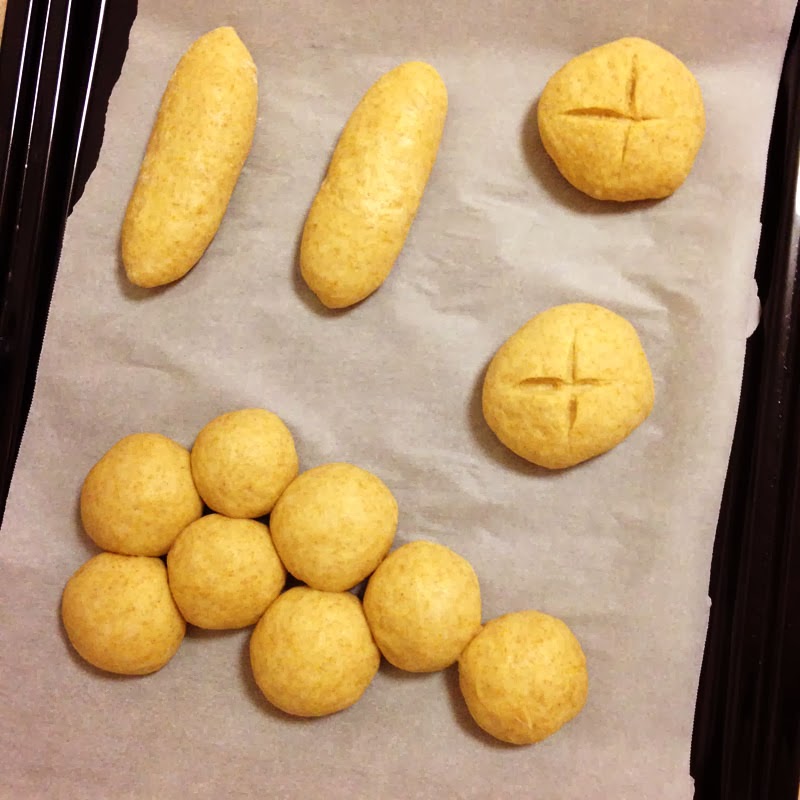
  3. Shape the dough into a ball, dust to prevent sticking. Let it do the 2nd rise for 90 minutes.
  4. Preheat the oven at 350F. Bake the dough for 45 minutes.
  5. Let it cool before slicing or storing.


酪乳麵包(一大顆)
原食譜來自 The New Artisan Bread in Five Minutes a Day, 作者 Jeff Hertzberg及 Zoë François

材料:

  • 溫水 228 克
  • 酪乳 120 克(可用醋或檸檬汁 8 克 + 牛奶 112 克)
  • 乾酵母粉 5 克
  • 鹽 8 克
  • 糖 10 克
  • 中筋麵粉 460 克


做法:
  1. 所有材料混合靜置發酵最多兩小時
  2. 將麵團放入冰箱冷藏最多五天,或是馬上接著烘烤。
  3. 將麵團整形成球形,若有需要可撒點麵粉避免粘黏。靜置做第二次發酵 90分鐘。
  4. 烤箱預熱 350F/175C,麵團放入烘烤 45分鐘。
  5. 完全放涼再切片或收納。
Pin It

12/21/2013

甜酒釀桂圓麵包 Fermented Rice Longan Bread


Pao-Chun Wu is the silver medalist of Bakery World Cup in 2008, and the champion of Master Bakers competition in 2010. He's from Taiwan, my home country.

In 2008's competition he made this unique Longan Wine Bread, using red wine and Taiwan's dried longan. It is inspired by a memory of a sweet, glutinous rice cake made with longan pulp and rice wine which his mom used to make during winter.

吳寶春在 2008年世界麵包團體賽中獲得第二名,2010首屆世界麵包大師賽拔得頭籌。他來自台灣,我的故鄉。

在 2008年的比賽中他使用紅酒與台灣的煙燻桂圓創作出酒釀桂圓麵包,靈感是來自小時候每到冬天媽媽做的桂圓糯米糕。


I've never tried his award-winning bread. I know nothing about red wine but really like dried longan. So I tried it with sweet fermented glutinous rice. This is not an imitation, just a inspiration from his master piece.

我沒有吃過這款大獎麵包,對紅酒也一無所知,但很喜歡桂圓的味道。所以我試著用甜酒釀來做這顆麵包。這不是仿作,只是由他的傑作中得到啟發。

A darker crust due to the sweetness gave by longan.
桂圓的糖份讓麵包表面顏色比較深。


The crust is not crusty due to the sweetness in longan. Still I used some steam when baking for a chewy crust. There's no alcohol fragrance in this bread. I think what the fermented rice gave this bread is the nice texture. Maybe next time if I want more wine aroma I'll try add some real rice wine, plum wine, or red wine.

因為桂圓當中的糖份影響,麵包表皮不是酥脆的,但在剛進爐烘烤時我仍然噴了一些水製造蒸汽,讓表皮有嚼勁。麵包本身沒有酒味,我想甜酒釀帶來的效果是在於麵包的口感吧。如果下回想要有比較明顯的酒香,或許可以試試看添加一些米酒、梅酒、或是紅酒。


Fermented Rice Longan Bread

Ingredients:

  • fermented glutinous rice 100 g
  • dried longan pulp 50 g
  • ingredients for European peasant bread dough, about 1 lb.

                (water 170 g, warm
                active dry yeast 3 g
                salt 4 g
                rye flour 15 g
                whole wheat flour 17 g
                all-purpose flour 195 g)

Directions:
  1. At least 1 day before baking day, cover and heat fermented glutinous rice and longan pulp in a small sauce pan until boil. Reduce heat and simmer for 10-15 minutes, covered, stir occasionally. Let it cool and store in the fridge for at least 1 day.
  2. Mix the longan mixture with other ingredients for European peasant bread. Let it rise at room temperature for 2 hours. Then keep it in the refrigerator for up to 5 days or use it for baking immediately.
  3. Dust and scrap the dough out, quickly shape it into a ball. Dust with more flour or use a scraper to scrap and fold the dough if needed. Let it rest on parchment paper for 70-90 minutes.
  4. Preheat the oven to 450F. Put the dough in and spray with water. Close the oven door and wait for 30 seconds to spray again. Repeat twice.
  5. Bake for total 30-35 minutes. Let it cool completely.

甜酒釀桂圓麵包

材料:


                (溫水 170 克
                乾酵母粉 3 克
                鹽 4 克
                裸麥粉 15 克
                全麥麵粉 17 克
                中筋麵粉 195 克)

做法:
  1. 在烘焙的至少一天前,將酒釀和桂圓用小鍋子加熱到滾,轉小火加蓋續滾 10-15分鐘,時不時攪拌一下。放涼冷藏至少一天。
  2. 將酒釀桂圓和其他歐式鄉村麵包的材料混合均勻,室溫下發酵 2小時,放入冰箱冷藏最多 5天,或是馬上接著烘烤。
  3. 麵團表面撒些粉,工作桌面也灑些粉,麵團刮出迅速整形成圓球狀,若會黏手可以適量再撒粉或是用刮刀輔助。麵團放在烘焙紙上二次發酵 70-90分鐘。
  4. 烤箱預熱 450F/230C,麵團送入烤箱並噴幾下水,關上烤箱門等 30秒再次噴水,重複兩次。
  5. 共烘烤 30-35分鐘。完全放涼再切片或收起來。


Pin It

12/20/2013

奇亞子鄉村麵包 European Peasant Bread with Chia Seeds


I used to mix chia seeds with drinks. For the first time I sprinkled it on the dough before baking and it gave my bread a pleasant nutty aroma. Also in some way it tastes a little bit salty and that's amazing because it is bland when eating raw. Guess I'll start to add chia seeds to baked goods more often and will substitute chia seeds for flaxseeds in any recipe calls for flax. Flaxseeds' nutrients can be absorbed only when being grounded but chia seeds can be digested whole.

The dough is European peasant bread, 5 days old. Before sending it to oven just spray the dough with some water and sprinkle with chia seeds, slash the dough, and bake. And the rest is the same with the making of European peasant bread.


通常我都是把奇亞子(又稱奇異子)加在水或是茶飲裡面,這是第一次用來烘焙,撒在麵團上面一起烤成麵包。烘烤過的奇亞子吃起來有點鹹鹹的、帶有迷人的堅果香氣,這真的很奇妙,加在飲料裡面生吃的時候它其實沒有味道呢!看來我會更常把它加在烘焙的東西裡面了,家裡也不需要亞麻子,任何需要用到亞麻子的烘焙食譜都可以用奇亞子來替代,更不用說亞麻子必須要磨成粉,營養成分才會被人體吸收利用,但是奇亞子整粒吃就可以被消化了喔!

這顆麵包的麵團是歐式鄉村麵包,冷藏了五天。麵團要送進烤箱之前噴點水、撒上奇亞子,麵團劃線,然後烘烤;其他的部分都和歐式鄉村麵包的製作一樣。


Chia seeds have been in Mayan and Aztec diet for centuries. It is the richest plant source of omega-3 fatty acids (ALA.) It's also an excellent source of dietary fiber (11 grams per ounce,) antioxidants, and minerals (18% of recommended daily intake of calcium, 27% phosphorus, and 30% manganese.)

It is believed to help reduce inflammation, reduce high cholesterol, lower cardiovascular disease, reduce stress level, enhance cognitive performance, protect body from free radicals, aging and cancer, help maintain a healthy weight, regulate blood sugar... In short, it's a superfood.

奇亞子在馬雅文化和阿茲特克文化的飲食中存在已久,是植物性 omega-3脂肪酸 (ALA)最豐富的來源,也富含膳食纖維(每 28克中含有 11克)、抗氧化物、多種礦物質(每日建議鈣質攝取量的 18%、磷 27%、錳 30%)

目前的研究相信它能幫助減輕身體的發炎反應、降低膽固醇、降低心血管疾病風險、減輕壓力、有助認知發展、保護人體免於自由基的傷害、預防老化和癌症、有助於維持健康的體重、穩定血糖... 總而言之,奇亞子是種超級食物。

Pin It

歐式鄉村麵包 European Peasant Bread


It is said that in ancient times white flour was so expensive that people in the countryside made bread with some other type flours. And these peasant bread was too rustic for urban tables. Nowadays we know that these rustic bread contains more nutrition and also the texture and flavor are more wonderful.

據說在古早時候白麵粉太高貴,所以鄉下的人們會用不同種類的麵粉做麵包。而這些鄉村麵包在當時被認為是上不了城市餐桌的。然而現在的我們知道這些鄉村麵包比白麵包含有更豐富的營養素,它的風味和口感也比白麵包更加美妙。


I have to say though it looks like a plain bread, too, but with a hint of rye and whole wheat flour, the flavor is different, more complex.

不得不提的是雖然這看起來也是個原味的麵包,但加了一點裸麥粉、一點全麥麵粉,吃起來味道就是不一樣,更加有層次了。

Baked from a 3-day-old dough.


European Peasant Bread (yields 2 loaves)
Recipe adapted from The New Artisan Bread in Five Minutes a Day by Jeff Hertzberg and Zoë François

Ingredients:

  • water 340 g, warm
  • active dry yeast 5 g
  • salt 8 g
  • rye flour 30 g (avoid stone-ground)
  • whole wheat flour 33 g
  • all-purpose flour 390 g


Directions:

  1. Mix everything in a big container. Loosely cover and let it sit at room temperature for 2 hrs.
  2. Put the dough into fridge while keeping the lid loose for 2-3 days. Use within the next 14 days.
  3. Dust the dough and cut off a handful. Quickly shape it into a ball and put it on a piece of parchment paper. Dust with more flour when needed. Let the dough sit for 70-80 minutes.
  4. Preheat the oven to 450F. Dust and slash the dough. Slide the dough into the oven, give it several sprays of water. Quickly close the oven door and wait for 30 secs. Open and spray several times again. Repeat 2 times.
  5. Bake for 30-35 mins. Let it cool for 2 hrs.


歐式鄉村麵包(可做 2顆)
原食譜來自 The New Artisan Bread in Five Minutes a Day,作者為 Jeff Hertzberg與 Zoë François

材料:

  • 溫水 340 克
  • 乾酵母粉 5 克
  • 鹽 8 克
  • 黑麥/裸麥粉 30 克
  • 全麥麵粉 33 克
  • 中筋麵粉 390 克


做法:

  1. 將所有材料於大保鮮盒中混合,蓋子輕輕蓋著於室溫靜置 2小時。
  2. 將麵團放入冰箱冷藏,保持蓋子鬆鬆的 2-3天。此麵團可冷藏保存 14天。
  3. 麵團表面撒些麵粉,單手抓起一大球麵團剪下。迅速整成圓球形,放到烘焙紙上(需要時再撒些麵粉以防沾手。)將麵團靜置 70-80分鐘。
  4. 烤箱預熱 450F/230C。麵團表面撒些麵粉、用刀劃線,放入烤箱。在麵團表面噴幾下水,迅速關上烤箱門將蒸汽關在裡面,30秒後再次噴水、關上烤箱門,共重複二次。
  5. 烘烤 30-35分鐘,出爐放涼 2小時。
Pin It

12/19/2013

起司免揉麵包 No-Knead Cheese Bread


I made this cheese bread with a 3-day-old plain dough. It's the dough left from last bread. The flavor and texture do become better when the dough is more aged. I'm going to try a much more aged dough very soon. Perhaps even try if my boy like sourdough. (I like it, but my husband is not a fan.)

這顆起司麵包是用冷藏三天的麵團做的,也就是上次做這顆免揉麵包時剩下的。麵團低溫發酵得比較久,麵包的風味和口感的確變得更好。接下來我就要來試試看放更久的麵團啦,說不定放到變酸麵包,試試看兒子會不會喜歡(我還挺喜歡,但先生不愛。)

A 3-day-old dough. | 冷藏三天的麵團


Maybe I should use high melting point cheese to keep those cheese cubes in shape. But it doesn't matter when the cheese melts and leaves holes in the crumb. Just make sure a baking sheet is put under the dough to prevent the cheese from dripping onto the bottom of the oven.

或許應該要找高熔點起司來用,烤的時候起司才不會熔化;不過讓起司在烘烤的時候熔化、留下大大小小的洞也不錯,只要確認有放張烤盤避免起司流到烤箱底部就好。

Love the flavor and the crumb! | 超喜歡這種味道和口感!


No-Knead Cheese Bread

Ingredients:

Directions:
  1. After taking the dough out of its container and shaping it into a ball, flatten it with hands to about 1/2 inch thick.
  2. Spread cheese cubes onto the dough. Roll up and shape into a ball.
  3. Let the dough rest for 60-90 mins.
  4. Preheat the oven to 450F. Dust and slash the dough. Slide the dough into oven, give it several sprays of water. Quickly close the oven door and wait for 30 secs. Open and spray several times again. Repeat 2 times.
  5. Bake for 30-35 mins. Let it cool for 2 hrs.


起司免揉麵包

材料:
  • 免揉麵包麵團一份,約 450克
  • Colby-Jack 起司,或是切達起司等個人喜歡的起司,切成約半吋大小的小丁,共約 50 克

做法:
  1. 將麵團由保鮮盒中刮出、整形成圓球狀之後,用手輕輕推壓扁平,約半吋的厚度。
  2. 將起司丁鋪在麵團上,麵團捲起再次整成球形。
  3. 麵團靜置 60-90分鐘。
  4. 烤箱預熱 450F/230C。麵團表面撒些麵粉、用刀劃線,放入烤箱。在麵團表面噴幾下水,迅速關上烤箱門將蒸汽關在裡面,30秒後再次噴水、關上烤箱門,共重複二次。
  5. 烘烤 30-35分鐘,出爐放涼 2小時。


**延伸閱讀:南瓜子起司免揉麵包
Pin It

12/17/2013

免揉麵包 No-Knead Bread


Since I got The New Artisan Bread in Five Minutes a Day by Jeff Hertzberg and Zoë François, I've been reading it. I had made no-knead bread using Jim Lahey's recipe before and was wondering if a Dutch oven is a must, and also if there's other formulas for different kinds of bread. There it is! It's in Jeff Hertzberg and Zoë François' book. (Gotta try rich bread soon!)

I'm not sure if I can share the Master Recipe here but actually it can be previewed on Amazon. (Here below I'll only describe it in Chinese.)

It, is, fantastic. Simply flour, water, salt, and yeast. Simply scrumptious.


I half the recipe cuz I don't have a bucket or container as big as 6 qt. A 9-cup Rubbermaid is the biggest lidded one I have, it seems a little small for half the recipe but still it works.


自從拿到 Jeff Hertzberg和 Zoë François的「5分鐘輕鬆在家做面包」(簡中翻譯)之後,我就一直在閱讀這本書。以前做過免揉麵包原創 Jim Lahey的食譜,就一直在想鍋子是否為必須、有沒有其他配方也可以用免揉的方法做出不同口味。都在這本 Jeff Hertzberg和 Zoë François的書裡面有了!
(註:台灣有出版的是他們另一本 Healthy Bread in Five Minutes a Day「5分鐘手感麵包」)

這真的是太棒了。只有麵粉、水、鹽、酵母,就這麼簡單的無與倫比的美味。

原本的食譜需要用個 5.7公升大水桶裝足以烤四顆麵包的麵團量,我沒有那麼大的容器,所以就減半製作,我最大的帶蓋保鮮盒還似乎有點點小,不過還是可行的喔!

(免揉麵包的原理:傳統麵包製作時的搓揉麵團步驟,是在將麵團中原本就存在的筋性重整,讓麵團有一定的強度可以把酵母製造出來的氣體關在裡面,烤出來的麵包才會膨脹、有一定的組織;而免揉麵包的高含水量讓麵團中的筋性足以自己重整排列,因此可以省略縮揉麵團這個讓許多烘焙新手卻步的步驟,而且事實上這麼濕黏的麵團也是幾乎無法搓揉的。)


免揉麵包(可做 2顆麵包)

材料:

  • 水 340 克,約 37度C
  • 乾酵母粉 5 克
  • 鹽 8 克
  • 中筋麵粉 455 克


做法:

  1. 將所有材料混合成很濕黏的麵團,確定沒有乾粉塊不均就可以了。蓋子蓋上留個小縫,室溫靜置兩小時。
  2. 兩小時後可以接續烘焙,或是將麵團放入冰箱,蓋子繼續保持有個小縫或是可透氣即可(第三天之後可以將蓋子蓋好),麵團可以冷藏保存最長到 14天。
  3. 將烤盤和烘焙紙準備好。在麵團表面撒些麵粉,用手抓起一團像葡萄柚大小的量,用廚房剪刀剪下。
  4. 迅速但輕柔的將麵團表面往下收攏成球形,如會黏手要適量使用麵粉,但不要添加太多也不需要將新的粉和麵團揉和。整好的球形麵團放上烘焙紙,靜置 40分鐘到 90分鐘(喜歡內部氣孔大一點就放 90分鐘。)
  5. 發酵時間快到時將一個略有深度的金屬空烤盤放入烤箱下層,烤箱預熱 230C
  6. 在麵團表面撒上麵粉、用刀割劃出幾條線。
  7. 預熱完成後將麵團送入烤箱,小心的在空烤盤倒入一杯熱水,迅速關上烤箱門將蒸氣鎖在烤箱裡面(也可以省略空烤盤這個部分,改在麵團進爐後朝麵團噴水幾下,關上烤箱等 30秒,再開門噴幾下水,重複此步驟共噴三次。)(這兩種做法和用鍋子烤的原理一樣,都是利用蒸氣讓麵包表面金黃酥脆。)
  8. 烘烤 30到 35分鐘(大約在烘烤了 20分鐘左右可以將烘焙紙抽掉,讓麵包底部也能烤得金黃),出爐在架上完全放涼再切片享用或是用紙袋收納。(我用作者不建議的塑膠夾鏈袋,但保持袋口有個小洞不完全夾好;若是覺得烤出來麵包皮太硬,就把塑膠袋完全密封,可以軟化表皮)


Mix everything up. | 將所有材料混合

Dough almost overgrew my container. It went back down a little in the fridge.
麵團差點要滿出我的保鮮盒,放入冰箱之後會稍微消下去是正常的。

One-day old dough. | 冷藏了一天的麵團

Grab it with hand. | 徒手抓起一大球

Put the rest back into fridge. | 剩下的繼續放回冰箱

Beautiful golden bread! I heard it sing!
金黃的麵包,我有聽到剛出爐噼啪作響的聲音!

Beautiful crumb, nice oven spring. | 內身組織很棒,麵團剛進爐的膨脹也很漂亮
(I really love taking pictures in the morning. The color and light are perfect.)
(早晨拍的照片光和色澤都好美)

Pin It

12/16/2013

葡萄乾核桃麵包(液種/法式中種)Walnut Raisin Bread (with Poolish)


Updated:
Recently I made this bread again using a serrated bread knife to slash. Works wonderful!

更新:
最近又做了這款麵包,發現用鋸齒麵包刀來做進爐前的麵團劃線效果很好喔!


After studying "baker's percentage" I created this recipe on my own. At the same time I tried poolish, a french style pre-ferments, a starter. According to this article on Weekend Bakery, bread made with a starter has better flavor and texture, also keeps better. I guess you can start with a starter using any recipe as long as you do the math correctly.

This self-designed recipe is by far the most satisfying.


在研究了一番「烘焙百分比」之後,我自行設計了這份食譜;同時也是第一次嘗試使用液種/法式中種來製作麵包。根據 Weekend Bakery上的這篇文章,使用這種預先發酵麵種的方式製作出來的麵包在風味和口感上都比較好,也比較不會那麼容易老化(自己做的麵包老得快,不像市售的有各種添加物去保持可口美味)。我想應該任何麵包食譜都可以使用這種方式製作,只要事前把材料比例做正確的計算就不會有問題。

這份自己設計的食譜做出來的成果,是做麵包以來我最滿意的一次。


Walnut Raisin Bread (with Poolish, 30% whole wheat)

Ingredients:

For Poolish

  • water 120-130 ml, 100-110F
  • yeast 2 g
  • all purpose flour 120 g

Main dough

  • all-purpose flour 10 g
  • whole wheat flour 70 g
  • salt 4 g
  • vegetable oil 2 g
  • walnut + raisin 50 g


Directions:

  1. Sprinkle and dissolve yeast into warm water. Let it sit for 5-10 minutes until it foams a little on top. 
  2. Mix in flour 120 g to make a very wet, gooey dough. Cover and let it sit at room temperature until bubbles form all over the surface. I let it sit for about 5 hrs. 
  3. When the poolish is ready, add in remaining flour, salt, oil, and mix well until smooth. I didn't want to knead it with hands cuz it's sticky, so I just used my bamboo spoon to kinda turn and fold and push the dough in mixing bowl (it's a big Rubbermaid food container actually.) 
  4. Fold in walnuts and raisins. Cover and let it rise at a warm place until doubled or won't spring back when being poked. 1.5 hrs. 
  5. Scrap the dough onto a floured countertop, punch down and knead a little. Shape, and put it on a baking sheet. Cover and let it rise again. 1-1.5hrs. (It won't grow as big as it did during 1st rise.) 
  6. Preheat oven to 400F. Dust lightly and slash as you like. Bake at 400F for 23 minutes.


葡萄乾核桃麵包(液種/法式中種,30%全麥)

材料:

液種/法式中種
  • 溫水 120-130 ml, 100-110F(約 40C)
  • 乾酵母 2 g
  • 中筋麵粉 120 g

主麵團
  • 中筋麵粉 10 g
  • 全麥麵粉 70 g
  • 鹽 4 g
  • 植物油 2 g
  • 葡萄乾+核桃 共 50 g


做法:

  1. 酵母粉溶於溫水中,靜置 5-10分鐘。 
  2. 加入麵粉 120 g,用木匙或筷子攪拌成一個很濕黏的麵團。加蓋密封靜置,直到表面覆滿大大小小的氣泡,時間長度視環境而定,這次我放了 5小時。 
  3. 液種完成之後,加入剩餘的麵粉、鹽、植物油,攪拌均勻成團直到光滑。因為麵團比較濕黏,這次我不用手揉,只是用我的竹匙直接在盆中翻折麵團。 
  4. 加入葡萄乾和核桃,加蓋並置於溫暖處進行第一次發酵,直到體積變大為兩倍或是手指沾麵粉戳了不會回彈,約 1.5小時。 
  5. 將麵團刮出到撒了麵粉的檯面,輕壓排氣並稍微揉幾下。依自己喜好整形,放上烤盤,以濕布覆蓋,置於溫暖處進行第二次發酵約 1-1.5小時。(麵團不會像第一次發酵那樣長大很多。) 
  6. 預熱烤箱 400F (205C)。輕輕篩上一層薄麵粉,在麵團表面依自己喜好割劃線條。放入烤箱烤 40分鐘。 


Poolish, before rise | 液種,發酵前

Poolish, after rise | 液種,發酵完成

main dough, before rise | 主麵團,發酵前

before 2nd rise | 第二次發酵前

after 2nd rise | 第二次發酵完成

dust and slash | 輕篩上薄麵粉,劃線

Walnut Raisin Bread, freshly baked | 新鮮出爐的葡萄乾核桃麵包

Can also be shaped into rolls. Reduce baking time. This one is actually made from a recipe from Cecillia.
也可以做成小圓麵包,烘焙時間要縮短。小圓麵包這次是使用 Cecillia優雅過生活的食譜。

Pin It

12/09/2013

台式肉鬆麵包 玉米麵包 奶油餐包(液種)Taiwanese Bread (using Poolish)


Taiwanese bread is similar to Japanese bread, it's soft, fluffy, richer, and often made with fillings or toppings. Yes, it's nostalgia, again. Generally I like European bread better. Love the simple and subtle flavor of wheat, love the crumb, the texture.

At times I crave these soft and shinny little guys. 

When designing this recipe I found that most Taiwanese bread dough contains egg. Egg makes the dough rise higher, thus come the fluffy bread, I think.

台式麵包和日式麵包很相似,比較柔軟、蓬鬆、含有比較多的油脂和糖,而且通常會有內餡或是在上面加各式各樣的食材。通常我比較喜歡歐式麵包,喜歡那種單純又微妙的麥香、硬硬的外皮、有嚼勁的口感。

有些時候就是想吃這種表皮閃亮亮、柔軟的台式麵包。

在設計這份食譜的時候,我才發現台式麵包的麵團中通常有蛋,蛋會讓麵團膨脹得比較大,也因此比較蓬鬆。


This is a basic dough recipe. With different shaping and toppings or fillings, there can be millions of variations.

這個食譜是基本麵團,整成不同形狀、使用不同的餡料或食材就可以有千變萬化的口味。


Taiwanese Bread (8 medium or 16 small buns.)

Ingredients:
  • water 160 ml, warm
  • active dry yeast 3 g
  • all-purpose flour 160 g + 170 g
  • sugar 20 g
  • vegetable oil / butter 20 g
  • salt 5 g
  • egg 1

Directions:
  1. Poolish: Mix water, yeast, and flour 160 g to form a very wet dough. Cover and let it rise for 2 hrs.
  2. Add all the other ingredients. (I substituted whole wheat flour 110 g for all-purpose flour.) Knead until smooth. (Add little amount of flour if needed.)
  3. Cover and let it rise for 40-60 mins.
  4. Shape as desired. Put on baking sheet and let it rise for 40 mins. (I slashed two of the dough before this rising.)
  5. Preheat the oven to 360F. Gently brush the dough with egg wash. Top with corn kernels, shredded mozzarella cheese, sprinkle with some ground herb.
  6. Bake for 18 minutes. Cool on a rack. For pork sung (rousong) flavor, spread mayonnaise on bread then pork sung. Gently shake off excess pork sung. For small butter buns, fill it with whipped spreadable butter. (For best flavor, before eating butter buns, reheat it in toaster oven for 3 or 4 mins and leave the bun in oven for 5 more minutes.)


台式麵包(8個麵包或 16個小餐包)

材料:
  • 溫水 160 ml
  • 乾酵母粉 3 克
  • 中筋麵粉 160 克 + 170 克
  • 砂糖 20 克
  • 植物油或奶油 20 克
  • 鹽 5 克
  • 雞蛋 1 顆

做法:
  1. 液種:將溫水、酵母、160克的麵粉混合成非常濕的麵團。加蓋發酵 2小時。
  2. 加入其他所有材料,揉成均勻光滑的麵團(我將其中 110 克的中筋麵粉用全麥麵粉取代。)若有需要可以加少量的麵粉。
  3. 加蓋,發酵 40分鐘到 1小時。
  4. 依喜好整形,放在烤盤上發酵 40分鐘。(在這次發酵之前我在其中兩個麵團表面用刀劃線。)
  5. 烤箱預熱 360F/180C。麵團表面輕輕刷上全蛋液。鋪上玉米粒、馬芝瑞拉起司,撒一些綜合香草。
  6. 送入烤箱烤 18分鐘,出爐後在架上放涼。肉鬆口味:麵包表面塗上適量美奶滋,撒上肉鬆,輕輕抖掉多餘的肉鬆。奶油餐包:用擠花袋或擠花筒將軟化的奶油擠入。(要吃奶油餐包之前用烤箱烤 3-4分鐘,時間到再悶 5 分鐘。)

Poolish: before rise. | 液種發酵前。

Poolish: risen. | 液種發酵後。

Main dough: before rise. | 麵團發酵前。

Main dough: risen in 1 hour. | 麵團發酵一小時後。

Divide the dough into 8, then divide 4 of them into 8.
分成8份,其中 4份再對半分 8份。


Risen dough. | 發酵後的麵團。

Brush with egg wash, top with desired toppings.
刷上全蛋液,鋪上喜歡的食材。

Bake at 360F for 18 mins. | 360F/180C 烤 18分鐘出爐。

Pin It
Related Posts Plugin for WordPress, Blogger...