11/26/2013

牛奶吐司 Milk Bread Loaf


Whole wheat is good for health, but sometimes I just want white bread. Like this milk bread.


Simplest food can be the most comforting.


I use half and half to make this loaf. I wasn't sure how much water content does half & half have. After reading some recipes and doing math, I guess it is 82-85% or so. Therefore 260 grams of half & half may sound much, but actually this bread has about 60% hydration. (Sandwich bread usually uses 57%-65% hydration.) Also half & half has a higher content of fat than milk, so I don't put much oil here.


全麥有益健康,但有時候就是想吃白麵包,像這條牛奶吐司。


最簡單的食物,可以是最療癒的。


我用一半牛奶、一半鮮奶油的 half and half來製作這條吐司。起初我並不確定 half and half的水分含量有多少,後來看了幾份食譜、做了一些試算之後,我想應該是 82%-85%的含水量吧。因此這裡用的 260克 half and half看似滿多的,其實這條麵包的配方含水量約 60%。(一般吐司麵包的含水量約是 57%-65%)而且 half and half的乳脂含量比牛奶還要高,所以配方中油脂的量也沒有特別增加。


It is soft and tasty. I sliced it after dinner and my husband protested because it smelt oh so good and he's so full. My little boy ate almost a slice, after dinner!


成果很香軟,晚餐後等到放涼了我舉刀切片,老公抗議說吃很飽了還要聞到這麼香的味道。兒子還吃掉了將近一片,在吃過晚餐的情況下。


Milk Bread Loaf (9x4x4 Pullman pan)

Ingredients:

  • half & half 260 g
  • active dry yeast 7 g (2 1/4 tsp)
  • sugar 20 g
  • salt 5 g
  • olive oil 20 g
  • all-purpose flour 370 g


Directions:


  1. In a mug microwave half & half 240g to 110-115F, pour into mixing bowl. Dissolve yeast and sugar, and let it sit for a few minutes until foamy. Set remaining half & half 20g aside for later use.
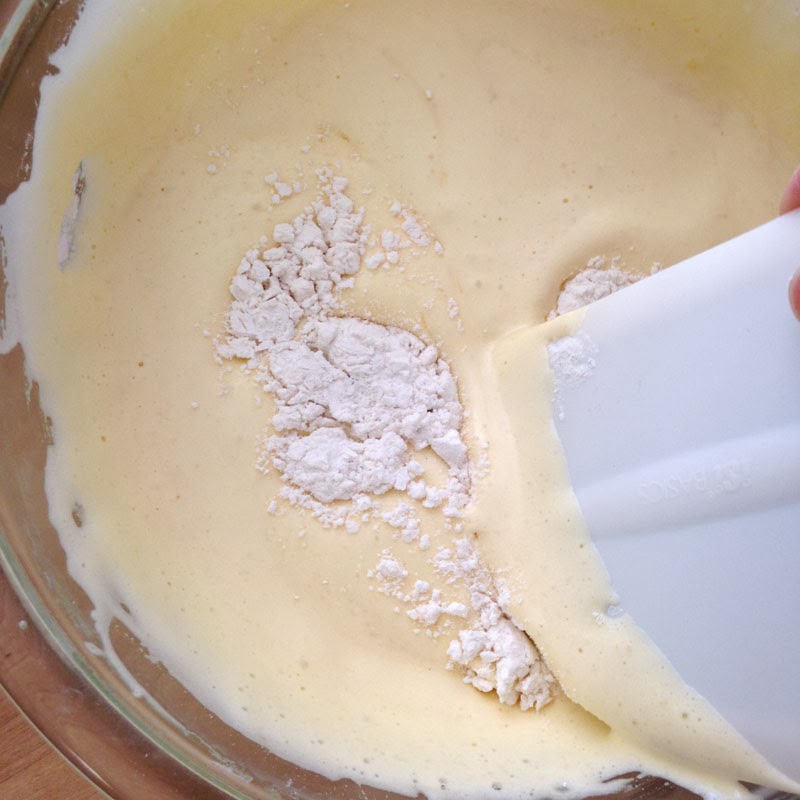
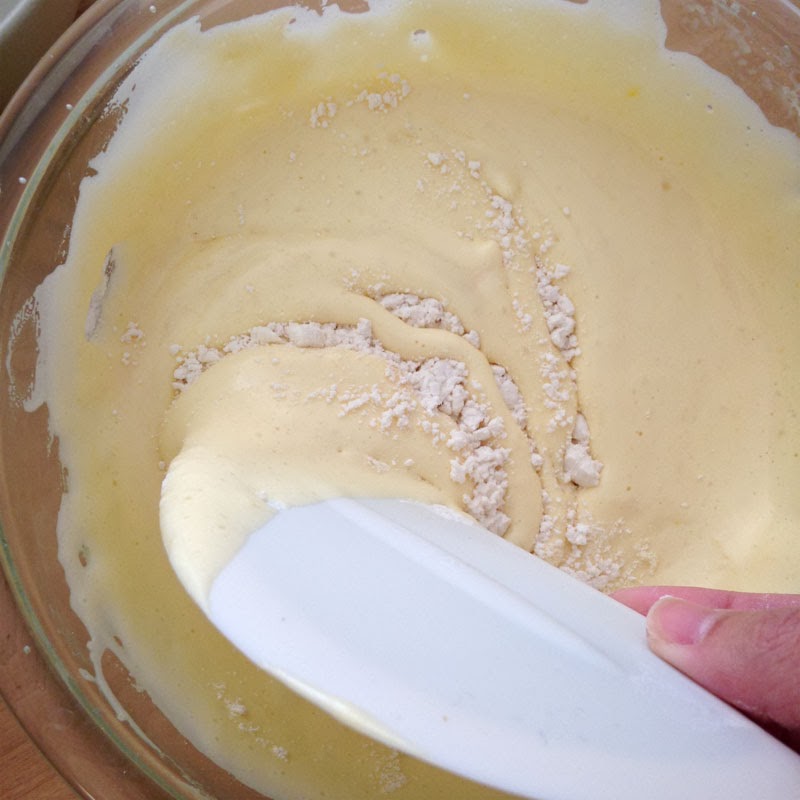
  2. Add salt, oil, and flour. Mix with a wooden spoon.
  3. When all the ingredients are well combined, gradually add remaining 20g of half & half. When all the liquid is absorbed and dough not so sticky anymore, turn it onto floured table to knead until smooth, soft, and elastic.
  4. Slightly grease the container, put the dough in. Spray with some water. Put it into an oven which is preheated for 1 min. Let it rise for 1 hr. (I didn't cover it but put a mug of hot water next to it.)
  5. Scrap the dough onto a floured surface. Punch down large bubbles. Cut into 2 pieces. Shape into balls. Cover and let them rest for 15 mins.
  6. Roll each dough out, flip and roll up gently. Cover and let them rest for 15 mins.
  7. Roll each dough out again, flip and roll up. Put it in a 9x4x4 pullman pan, seam side down. Put in a warm oven to rise, about 30-45 mins.
  8. When the dough is just below the rim of pan, close the lid. Let it rise for 10 more mins or so while the oven is preheating.
  9. Bake at 350F for 25 mins. Remove the lid and bake for 20 more mins. Let it cool on a rack before slicing or storing.


牛奶吐司(9x4x4吋帶蓋吐司)

材料:

  • half & half 260 克(一半牛奶、一半鮮奶油)
  • 乾酵母粉 7 克(2 1/4小匙)
  • 砂糖 20 克
  • 鹽 5 克
  • 橄欖油 20 克
  • 中筋麵粉 370 克


做法:


  1. 用馬克杯秤量 240克的 half & half,微波加熱到 110-115F/43-46C,倒入攪拌用的大容器中。加入酵母和糖溶解,靜置幾分鐘到表面有細緻的泡沫狀。剩下 20克 half & half放一旁稍後使用。
  2. 加入鹽、油、麵粉,用木匙攪拌成團。
  3. 攪拌過程中分次逐漸加入剩下的 20克 half & half。液體都被麵團吸收、麵團也不再那麼濕黏之後,移到撒有薄薄麵粉的桌上搓揉翻折到光滑柔軟有彈性。
  4. 將麵團放入塗有一點油的容器裡,噴點水,放入預熱一分鐘微溫的烤箱中發酵一小時。(因為是密閉空間所以我沒有加蓋,但是在旁邊放了杯熱水。)
  5. 將麵團刮出到撒了麵粉的桌上,輕壓排氣。分成二等份滾圓,以濕布覆蓋休息 15分鐘。
  6. 將麵團桿開、翻面、輕輕捲起,以濕布覆蓋休息 15分鐘。
  7. 將麵團再次桿開、翻面、輕輕捲起,接縫朝下放入烤模中,放入微溫的烤箱第二次發酵 30-45分鐘。(根據廚房溫濕度不同,需要的時間可能不同。)
  8. 麵團發到接近烤模高度時,輕輕蓋上蓋子。開始預熱烤箱,同時也讓麵團再發酵 10分鐘左右。
  9. 以 350F/175C 帶蓋烤 25分鐘,時間到拿掉蓋子再烤 20分鐘。取出脫模置於架上放涼,完全涼了再切片或儲存。


When adding the liquid, it could be super sticky at first.
剛加入液體的時候,麵團會變得非常濕黏。

Keep kneading patiently. It can become a beautiful dough like this in just 2 mins.
繼續耐心的揉,僅僅 2分鐘之後就變成這麼光滑漂亮。


After 1st rise. | 一次發酵完成。


Close the lid when it's almost full. | 快滿的時候蓋上蓋子。


Usually I don't like to pre slice bread. But this time I just felt so good slicing...
通常我不喜歡一下子全切好,但這次切起來好過癮呀...

Pin It

11/25/2013

半熟蜂蜜凹蛋糕 Japanese Honey Sponge Lava Cake


This honey lava cake (半熟カステラ; 半熟 Castella) has been popular in Taiwan for a while. I saw people waiting in a long line just to get one during our summer trip there. Had never tried it before but guess it would be awesome with simple ingredients. My favorite baking blogger Carol posted this recipe and I tried making it today. (Here's the recipe in Chinese: Carol Easy Life.)

I don't have a 6" round cake pan but the inner pot of my rice cooker is just right 6" though it is deeper. I baked this cake in it with parchment paper lined. The top is not so browned but still the taste is good.

半熟蜂蜜凹蛋糕(半熟カステラ; 半熟 Castella)在台灣流行一陣子了,今年夏天回去時到處都可以看到長長的排隊人龍在等著要買。之前從沒吃過這種蛋糕,但看它的成分我想那會是種單純的美味。大家都喜歡的烘焙部落客 Carol幾個月前推出了這款食譜,今天我試做了一下。(以下只列出英文版食譜及做法,中文原版請到 Carol 自在生活:半熟蜂蜜蛋糕(凹蛋糕)

我沒有 6吋圓模,但有個大同電鍋的內鍋剛好直徑 6吋,雖然它比較深,但我在裡面鋪了烘焙紙就照樣拿來烤蛋糕用。烤出來表面沒有那麼漂亮的焦糖色,但味道還是很棒。


Japanese Honey Sponge Lava Cake (半熟カステラ; 半熟 Castella) 6"
Ingredients:

  • egg 1
  • egg yolk 3
  • granulated sugar 30 g
  • honey 15 g
  • cake flour 20 g, sifted (I use all-purpose flour 17 g + cornstarch 3 g, sift together for 3-4 times.)
  • vanilla extract 1/4 teaspoon


Directions:

  1. Measure and prepare all the ingredients. Line a 6-inch round baking pan with parchment paper. Fill a large pot with warm water (about 125F) to half way full. Preheat oven to 340F.
  2. Beat egg, egg yolks, sugar, and honey in a mixing bowl on low until well combined.
  3. Put the mixing bowl into the large pot with warm water and beat on high until the mixture is pale, fluffy, and ribbons.
  4. Drip vanilla extract, mix well.
  5. Gently fold in half the flour until just combined. Fold in remaining flour.
  6. Pour the batter into prepared pan. Bake at 340F for 16-20 mins (depends on how much you like the cake baked.) (According to Carol, if bake for 16 mins the center of the cake will be runny. 20 mins will be gooey, and 25 mins fully baked.)
  7. Let the cake cool out of the pan on a rack. (The center will sink when cool.) Tear off the paper when cool. (With the paper on it looks nice and can be given away as a gift.)


Remark:
I baked at 340F for 18mins but the top was still pale and cake wobbled. So I baked for 5 more mins. (I think this browning issue is because of the different depth of the pans.)

附註:
我用 340F/170C 烤了 18分鐘,但表面仍然未上色,而且蛋糕體看起來還會晃動沒有定型,所以又多烤了 5分鐘。這應該是因為我用大同電鍋的內鍋烤,烤模深度不同的關係。


3 grams of cornstarch, than all-purpose flour.
3克的玉米澱粉,然後再加中筋麵粉。

Get all the ingredients ready. | 材料都先備齊。

Beat the egg mixture with mixing bowl in warm water.
隔水加溫打發蛋液。


Beat until it ribbons. | 打發至蛋液滴落有明顯皺摺。

Vanilla extract. | 加入香草精。

Gently fold in flour. | 輕輕拌入麵粉。


Pour into prepared pan.  | 倒入烤模中。

Freshly baked cake. | 剛出爐。

It will sink when cool. The shorter you bake it, the more it will sink.
放涼後中心會稍微凹下去。烤得時間愈短,凹的程度愈大。

So fluffy, so light. | 鬆軟輕巧

6" is just so small that we gobbled it up so quickly...
6吋實在是很小,一下就吃光光了...

Gooey honey lava. | 黏黏的蜂蜜漿。

It tastes so wonderful with a cup of unsweetened hot tea.
配上一杯無糖熱茶,好棒。

Pin It

11/24/2013

帶蓋吐司 Pullman Loaf


Since I received my pullman pan, I had been trying to bake a nice loaf. 

The first time I failed. The bread has a thick, tough crust, and also a sunken top. I did some searching before making it and found most pullman recipe bake at 400F. A baking blog I often visit suggests 40 mins at 410F. I baked this first loaf at 400F for 30mins and it has a thick crust. I asked questions in Bread Baking group and bakers say it looks like under knead and over risen.


自從收到我的帶蓋吐司模以來,我一直都在試著要烤出漂亮的吐司。

第一次失敗了,麵包皮很厚很硬,而且頂面凹陷。開始動手之前我搜尋了一下,大部份的帶蓋吐司食譜用 400F/205C烘烤,而我常常看的烘焙部落格 Carol自在生活建議 410F/210C烤 40分鐘。我用 400F烤 30分鐘,結果就是又厚又硬的皮。我在麵包烘焙社團發問,前輩們說麵包看起來是揉得不夠、發得太過。


The first loaf. Failed.

This crust problem was solved when I tried it the second time. I found recipes on USA Pans website and it says 350F, 25 mins with lid plus 20 mins without lid. The crust came out thin and softer than first loaf. But yet a sunken top. 

But I found the reason myself when I opened the lid a little and peeked right before sending it into the oven, after the 2nd rise was complete... I thought I heard a hiss...

Peeking makes the dough deflate and results in a collapsed top.


厚皮的問題在第二次嘗試時解決了。我在這個吐司模的廠商網站上找到食譜,用 350F烤 25分鐘,然後蓋子拿掉再烤 20分鐘。麵包皮的部分烤出來薄多了,也比較軟。但是,仍然有頂面凹陷的問題。

不過這回我自己找到原因了,就在二次發酵完成,要把麵包送進烤箱之前我把蓋子打開一些偷看了一下,我似乎聽到了一陣嘶聲...

偷看的動作讓麵團消氣,導致烤出來的麵包頂部凹陷。


The second loaf. Failed.

Third time's the charm! The third time I used freshly bought yeast and did more kneading (I did the windowpane test and the poke test!) (Click for more info about testing dough.) The proofing went so quickly and so big! My dough reached the lid of the container and I seldom had a first rising like this! And in just 25 mins in a warm oven the 2nd rise grew higher than my pan so I couldn't cover it. I punched it down, shaped it again. Lower the proofing temperature and watched it closely as it was rising. Closed the lid when almost full (about 45 mins.) I waited for 10 more mins before started to preheat (just want a perfectly square shape bread so badly.) When the bread was baked, it overflowed the pan, left a funny look. 

It tastes nice though. And by just trimming off the excess crust, I had a satisfying loaf!


事不過三!第三次製作我用的新買的酵母,也多花了些時間揉麵團,還做了揉麵是否完成的一些測試(戳了會快速恢復原狀、可以撐出薄膜)(參考網頁在這)。麵團發酵得又快又大,都碰到我的大保鮮盒蓋子了,這種結果在我的麵團不常見哪!而且二次發酵時,在微溫的烤箱裡僅僅 25分鐘,麵團就長大到比吐司模還高,根本沒辦法蓋蓋子,我只好把麵團刮出來排氣重新整形,重新再做一次發酵,這回降低發酵的溫度,緊緊看著到快滿模時就蓋上蓋子(約45分鐘),等十分鐘後開始預熱烤箱(實在太想要方正的吐司,所以貪心的希望它滿模,滿到不行)。麵包烤好之後,麵團無處可去就從烤模的縫隙擠了出來,看起來還挺好笑的。

不過只要把這些多餘的麵包皮切掉,吐司本身還挺好吃喔!


The third loaf!


Pullman Loaf (9x4x4)

Ingredients:
  • water 240 ml, 110-115F
  • honey 1 Tablespoon (21 g)
  • active dry yeast 9 g (this time I used Bob's Red Mill)
  • olive oil 2 Tablespoons (27g)
  • salt 5 g
  • whole wheat flour 125 g
  • all-purpose flour 285 g


Directions:

  1. In a large food container dissolve yeast with water 220 ml and honey. Let it sit for 5 mins. 
  2. Add salt, oil, and flour, mix with a wooden spoon to form a dough. Gradually add the remaining 20 ml of water. 
  3. Knead the dough by hand on countertop until dough is smooth, soft, and elastic, about 15 mins. 
  4. Slightly grease the container, put the dough in it. Spray with some water, gently cover it with lid. Put it into an oven which is preheated for 1 min. Let it rise for 1 hr. 
  5. Scrap the dough out onto a floured surface. Punch down large bubbles. Gently knead for a few times. Cut into 2 pieces. Roll each dough out, flip and roll up gently. Cover with damp cloth and let it rest for 5 mins. 
  6. Roll each dough out again, flip and roll up. Put it in pan, seam side down. Put in a warm oven to rise until 1 inch lower than the pan rim. Close the lid. (Don't spray water before 2nd rise. Water on the walls of pan cause sticking in my case.) 
  7. Bake at 350F for 25 mins. Remove the lid and bake for 20 mins. Let it cool out of the pan on a rack before slicing or storing.


帶蓋吐司(12兩)(9x4x4吋)
材料:
  • 溫水 240 ml, 約 40C
  • 蜂蜜 1 大匙(21 克)
  • 乾酵母粉 9 克(這次我用 Bob's Red Mill這牌子,它是需要冷藏的,酵母活性會保存得比較好)
  • 橄欖油 2 大匙(27 克)
  • 鹽 5 克
  • 全麥麵粉 125 克
  • 中筋麵粉 285 克

做法:

  1. 大保鮮盒中以溫水 220 ml溶解蜂蜜,加入酵母靜置 5分鐘。 
  2. 加入鹽、橄欖油、麵粉,以木匙攪拌成團,逐漸分次加入剩下的水分 20 ml。 
  3. 將麵團移到桌面上,雙手使勁搓揉翻折直到麵團光滑柔軟有彈性,大約 15分鐘。 
  4. 保鮮盒內塗一點油,麵團放入噴些水,蓋上蓋子,放入微溫的烤箱(預熱一分鐘後關掉)發酵一小時。 
  5. 將麵團刮出到撒了麵粉的桌面,輕壓排氣,輕輕翻揉幾下,分成兩等份。將麵團分別桿開,翻面後輕輕捲起,以微濕的布巾覆蓋,讓麵團休息 5分鐘。 
  6. 將麵團再次桿開,翻面輕輕捲起,接縫朝下放入吐司模中,置於微溫的烤箱中發酵,直到幾近滿模,蓋上蓋子。(放入烤模發酵之前不要再噴水,烤模內壁有水會造成麵包粘黏) 
  7. 以 350F/180C烘烤 25分鐘,蓋子拿掉再烤 20分鐘。出爐後脫模放涼再切片或裝袋保存。 


After kneading. It looks slightly bigger than usual already.
揉麵完畢,此時麵團看起來已經比往常的大一點了。


After 1st rise. | 一次發酵完畢。


Before 2nd rise. | 二次發酵之前。


In just 25 mins! | 才 25分鐘就長這麼大!


Let's do it again... | 二次發酵重新來


It's not the prettiest loaf but I'm satisfied. | 雖然不是挺漂亮的吐司,但已可稱滿意了。

The first loaf became baked french toast for a Saturday breakfast.
第一條失敗的吐司變成某個星期六早餐的烤法式吐司了。

Pin It

11/17/2013

原味吐司 Toast/Sandwich Bread Loaf


I ordered a Pullman pan and am waiting for its arrival. Feel excited that I can bake flat top bread at home! That is what plain toast loaf looks like in my home country. Those with round top are usually swirl bread loaves with fillings. But here in California, I haven't seen any flat top bread loaf in store (Except for one Chinese bakery whose bread won't get mold no matter how long you leave it.) It's nostalgia. Not particularly for my homeland, but for a period of time when having a small toaster on top of TV in a tiny suite, a jar of jam and a bottle of garlic butter spread means hot homemade breakfast.

The simplest flavor carries memories.

Though I haven't got my Pullman, I made this plain loaf today at the request of my husband.

我訂了一個帶蓋吐司模正在等它送到,想到可以在家做四四方方的吐司麵包就覺得很興奮!在台灣,原味白土司都是長那個樣子的,頂上圓圓的吐司通常都是有餡有料的。在加州我倒是還沒有看過哪裡有賣四四方方的吐司(只有某家華人麵包店,麵包都不會發霉...。)真是懷念呀,也不是特別想念故鄉,而是懷念起那段小套房的日子,電視機上一台小小的烤箱、還有一罐果醬、一罐香蒜醬,早上就可以自己做熱熱的早餐。

最簡單的味道,承載的是回憶。

雖然我的帶蓋吐司模還沒到,今天還是做了條原味吐司,因為老公想吃。


Soft, nice crumb. | 柔軟香甜的口感


Toast/Sandwich Bread Loaf (9x5) (30% whole wheat)
Ingredients:

  • water 235 ml, 100-110F, divided.
  • active dry yeast 9 g
  • brown sugar 35 g
  • sugar 30 g (Updated: I tried using only 1 Tablespoon = 21 g of honey and it tastes better. Could try a total 1 Tablespoon = 12 - 14g of sugar.)
  • salt 5 g
  • olive oil 30 ml
  • whole wheat flour 125 g
  • all-purpose flour 285 g

Directions:

  1. In a large food container dissolve yeast with water 215 ml. Let it sit for 5 mins.
  2. Add sugar, salt, oil, and flour, mix with a wooden spoon.
  3. Knead the dough right in the container. When all the ingredients are well combined, gradually add remaining 20 ml water. After each addition, knead until the dough has absorbed the water. Keep kneading until dough is smooth, soft, and elastic.
  4. Slightly grease the container, leave the dough in it. Spray with some water, gently cover it with lid. Put it into an oven which is preheated for 1 min. Let it rise for 1 hr.
  5. Scrap the dough out onto a floured surface. Punch down large bubbles. Gently fold for a few times. Cut into 2 pieces. Roll each dough out, flip and roll up gently. Cover with damp cloth and let it rest for 5 mins.
  6. Roll each dough out again, flip and roll up. Put it in a 9x5 pan, seam side down. Spray with some water and put in a warm oven to rise, about 1 - 1.5 hrs.
  7. Bake at 350F for 30 mins. Let it cool on a rack before slicing or storing.


原味吐司(9x5吋)(30%全麥)
材料:

  • 水 235 ml, 100-110F/40C, 分成 215 ml + 20 ml使用
  • 乾酵母粉 9 g
  • 黑糖 35 g
  • 白砂糖 30 g(更新:我試了只用蜂蜜 1大匙 = 21克,味道好很多。也可以試試看兩種糖共 1大匙 = 12-14克。)
  • 鹽 5 g
  • 橄欖油 30 ml (27 g)
  • 全麥麵粉 125 g
  • 中筋麵粉 285 g


做法:

  1. 在大保鮮盒中放入 215 ml溫水,加入乾酵母粉,靜置 5分鐘。
  2. 加入糖、鹽、橄欖油、麵粉,以木匙攪拌到結塊。
  3. 用手直接在保鮮盒中翻折搓揉,揉成均勻的麵團,然後開始分次加入保留的 20 ml水份,每次加入都耐心揉到麵團把水分吸收,再繼續添加,把水分都加完。繼續揉到麵團光滑柔軟有彈性。
  4. 在保鮮盒內塗一層薄薄的油,將麵團整圓放好,噴幾下水,保鮮盒蓋輕輕蓋上,放入預熱一分鐘的烤箱做第一次發酵,約 1 小時。
  5. 將麵團刮出到撒了麵粉的桌面,輕壓把大氣泡排除,輕輕翻折幾下,分割成二等份,分別擀成長條狀,翻面後由短邊輕輕捲起,以擰乾的濕布覆蓋靜置 5分鐘。
  6. 將麵團再次擀開成長條狀,翻面後由短邊輕輕捲起,接縫處朝下放入烤模,噴幾下水放入溫暖的烤箱中第二次發酵,約 1 - 1.5 小時。
  7. 以 350F/180C 烘烤 30分鐘,取出在網架上放涼再切片或裝袋。


I love it when my dough cleans the bowl. | 當麵團揉好,碗壁乾乾淨淨的時候,感覺真好。

My non-stick pan begins to stick, so I use parchment paper. | 我的不沾烤盤開始會沾了,所以我用烘焙紙。

Oh it looks like baby bottoms... And that's my baby in the background.
看起來好像嬰兒小屁股...背景是我的心肝寶貝。


Pin It

荷蘭蘋果蛋糕 Dutch Apple Cake


At first it was a big sale at my favorite local supermarket. I started my little journey searching for apple recipes. There's one for pork chops with caramelized apple. There's one for apple turnovers, couples for apple pancakes, and one for apple chips. There's one for apple bacon pizza which looks so great. Mentioned above haven't been made yet.

I made a spiced apple cream cheese coffee cake last time for a party. This time, yes also for a party, I made a Dutch apple cake. 

起初,是因為這邊我最喜歡的超市有一場蘋果大特賣,我就開始尋找各種蘋果食譜。有焦糖蘋果豬排、有蘋果派、蘋果鬆餅、蘋果脆片,也有看起來很讚的蘋果培根比薩。不過以上所提的我都還沒做過。

上次要去參加萬聖節派對的時候我烤了肉桂蘋果起司蛋糕,這次也是要參加派對,我做了荷蘭蘋果蛋糕。


There are tons of different recipes for Dutch apple cake, some say it's Norwegian apple cake. Some say the batter is runny and those apple slices sink to the bottom. This recipe I used didn't mention what consistency the batter should have, and I doubted if it would work when making it. It's very, very thick. Thicker than pancake batter. I had to get my fingers pushing those apple slices into the batter otherwise I wouldn't be able to put them all in. When baked, the apple slices remained on top. (The author mentioned that this cake is great for a parent/grandparent who has little sous-chefs. Kids can help place the apples into batter.)

Hopefully it turned out with great taste. I don't think it's a pretty cake but it did tastes good. It's dense, more like a Japanese honey cake. I didn't serve it warm as the recipe suggests since I made it the day before, but I think it would be awesome when warm. It keeps well. Usually I don't like sweet breakfast but I think this cake would make a good one, with tea or coffee or hot milk.

荷蘭蘋果蛋糕的食譜百百種,有些甚至說它也叫挪威蘋果蛋糕。有些說生麵糊很稀很水,蘋果片會沈到蛋糕底。我參考的這份食譜並沒有提到麵糊的濃稠度,在製作的時候我一度很懷疑有沒有弄錯了;這麵糊非常非常濃稠,比鬆餅麵糊還要濃,以致於放蘋果片的時候必須用手指把蘋果片給壓進麵糊,不然根本放不完全部的蘋果啊!烘烤完成之後,蘋果片通通都還在蛋糕上半部。(作者還提到這個蛋糕很適合家有小二廚的家長,小朋友可以幫忙把蘋果片插到麵糊裡。)

幸好結果滿不錯的,它不是個漂亮的蛋糕,但是味道很不錯。這蛋糕很紮實,比較像蜂蜜蛋糕。因為是前一天就做好的,所以我們沒有像食譜建議的溫溫的吃,溫熱的吃應該會很棒。它也滿適合隔夜吃,通常我不喜歡早餐吃甜食,但這個蛋糕我覺得當早餐吃也滿棒的,可以配熱茶、咖啡、熱牛奶。

The recipe is from One Perfect Bite. Please click to get it.


荷蘭蘋果蛋糕(9x5吋長方形烤模)
材料:

  • 蘋果 3 顆,中等大小,去皮去核切成 1/4吋的薄片
  • 糖 3 大匙 + 1杯,分開使用
  • 肉桂粉 1 小匙
  • 無鹽奶油 2/3 杯,室溫軟化
  • 雞蛋 4 顆
  • 香草精 1 小匙
  • 中筋麵粉 2 杯
  • 鹽 1/8 小匙


做法:

  1. 將蘋果片與糖 3 大匙、肉桂粉混合,靜置一小時。
  2. 烤箱預熱 300F/150C,9x5烤盤內壁塗上一層奶油(或鋪上防粘烘焙紙)。奶油、糖 1 大杯在攪拌盆中攪打成蓬鬆泛白狀,加入雞蛋,一次 1 顆,攪打均勻後再加下 1 顆。
  3. 雞蛋全都加入後,加香草精混合均勻;將麵粉和鹽混合,分次加入麵糊並攪拌到均勻滑順。
  4. 將麵糊倒入烤盤,把蘋果片逐片垂直插入麵糊中,緊密地排在一起。送入烤箱烘烤 1 小時 30分鐘 - 1 小時 45 分鐘。
  5. 烤好後在烤盤中放 10分鐘再取出,建議溫熱著吃。


I tried a small piece before the party. | 當天早上我先試吃了一小片。

It's not pretty, but it's tasty. | 不好看,但挺好吃的喔!


Pin It
Related Posts Plugin for WordPress, Blogger...